Tutorials
LDD Update and Build Tutorial
Objective:
create a test LDD Repository from the LDD Template
create a branch and pull request with the link to an issue
merge a pull request
see Github Actions and LDD Continuous Integration in action
Pre-requisites:
Github Desktop has been installed
Github Desktop has been opened on your computer, and you have logged into your Github.com account
Note
The steps of this tutorial are specific to Github Desktop. However, there is nothing preventing you from completing this tutorial using the command-line of Github.com editors if you prefer.
0. Request Test Token from EN
For the time being, in order to successfully auto-generate the LDD, you will need to request a Test Token from EN. The auto-generation is not necessarily required to complete the tutorial, but are available upon request. Email PDS Help Desk and request a Temporary Test Token for the PDS LDD Tutorial. This will expire in 1 week.
Feel free to proceed with the steps up to 1e where the Test Token is needed.
1. Clone the ldd-template repository
Let’s first, clone the repo from Github.com to our local computer.
Go to the ldd-template repo
Click the
Use this templatebutton to create a new repo from this template

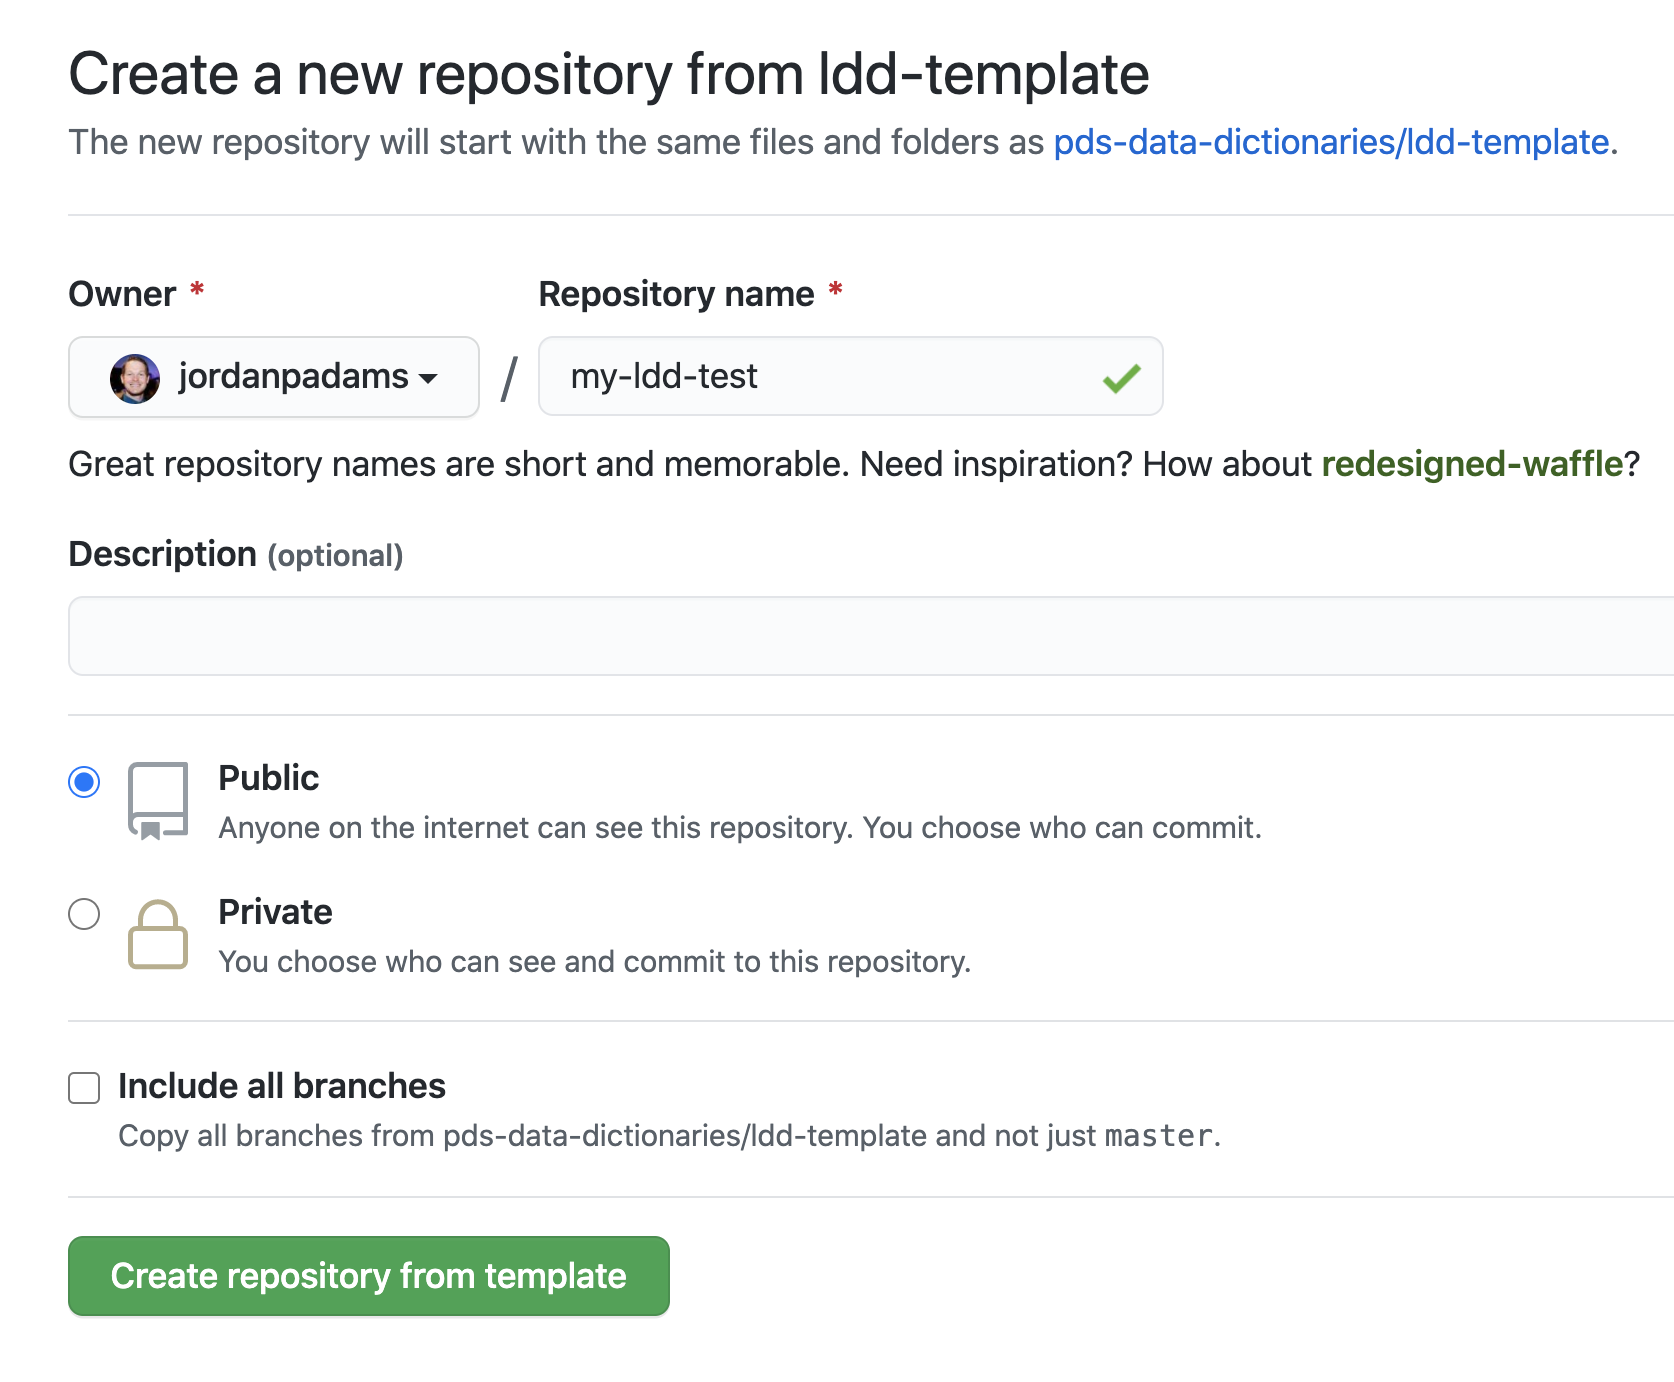
You will then be taken to a screen to create your repo. Make sure
Owneris set to your personal account, give it a name, and clickCreate repository from template
- Add the pdsen-ci user as a collaborator so the LDD Automation will work properly with the PDSEN CI Bot.
In your test repo you just cloned, go to
Settings->CollaboratorsClick
Add People, search for and addpdsen-ciuser (PDSEN CI Bot).The EN Team will then notify you when the request has been accepted.
Next, once you get the Github Test Token from EN, you will now need to add it to your repository Secrets to allow the PDSEN CI Bot to push to your repository.
- In your test repo you just cloned, go to
Settings->Secrets->Actions
- In your test repo you just cloned, go to
Click
New Repository SecretName = ADMIN_GITHUB_TOKEN , Value: paste the temporary token sent you by Engineering Node
Select Add Secret
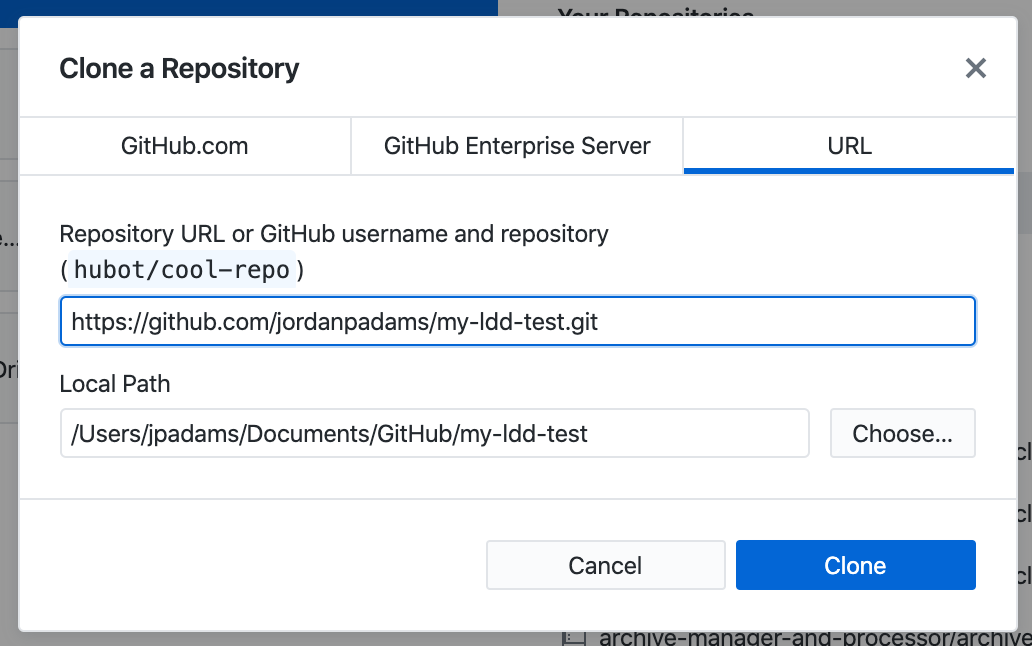
Open Github Desktop. In the right column, either browse to or search for your repository, select
Clone <username>/<repo-name>
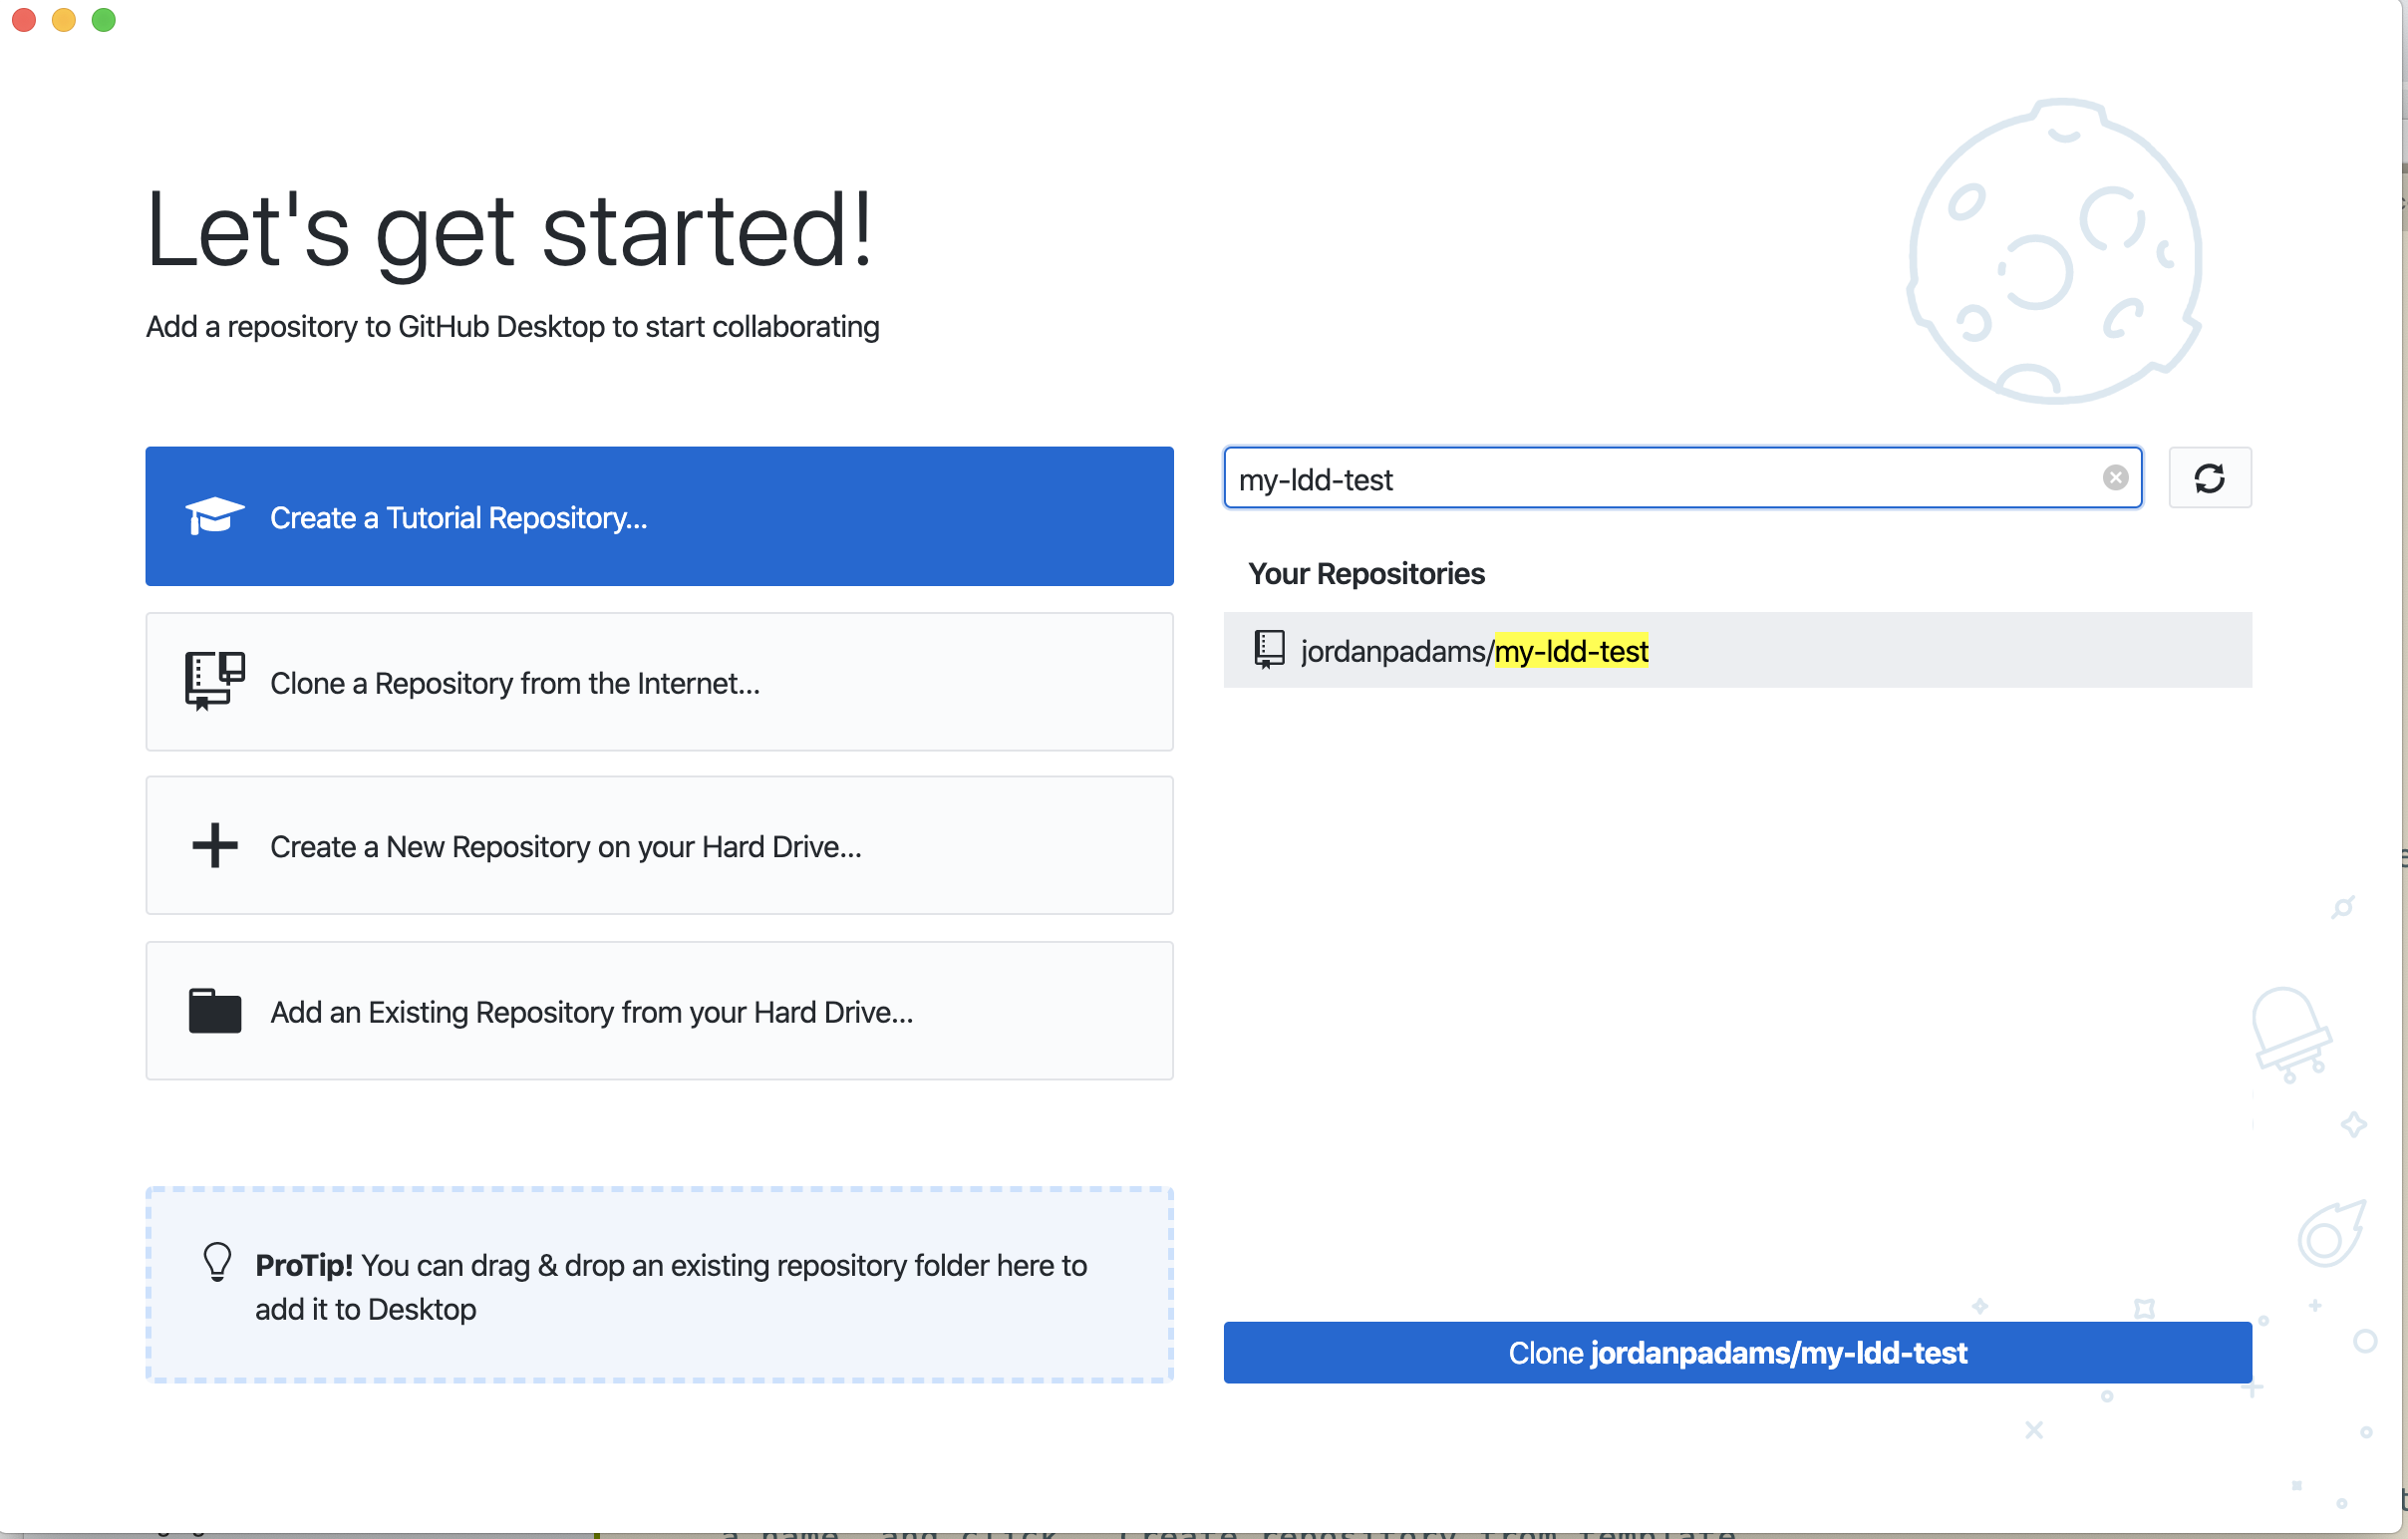
Choose the path you would like to save the repository to on your file system, and click
Clone.
You should now see a screen in Github Desktop that says
No Local Changes, indicating your repo is connected and there are no changes to that repo on your local system (as expected).

2. Create a Branch for Your Proposed Changes
Now that we have the repo on our local machine, let’s create a new branch to put our changes.
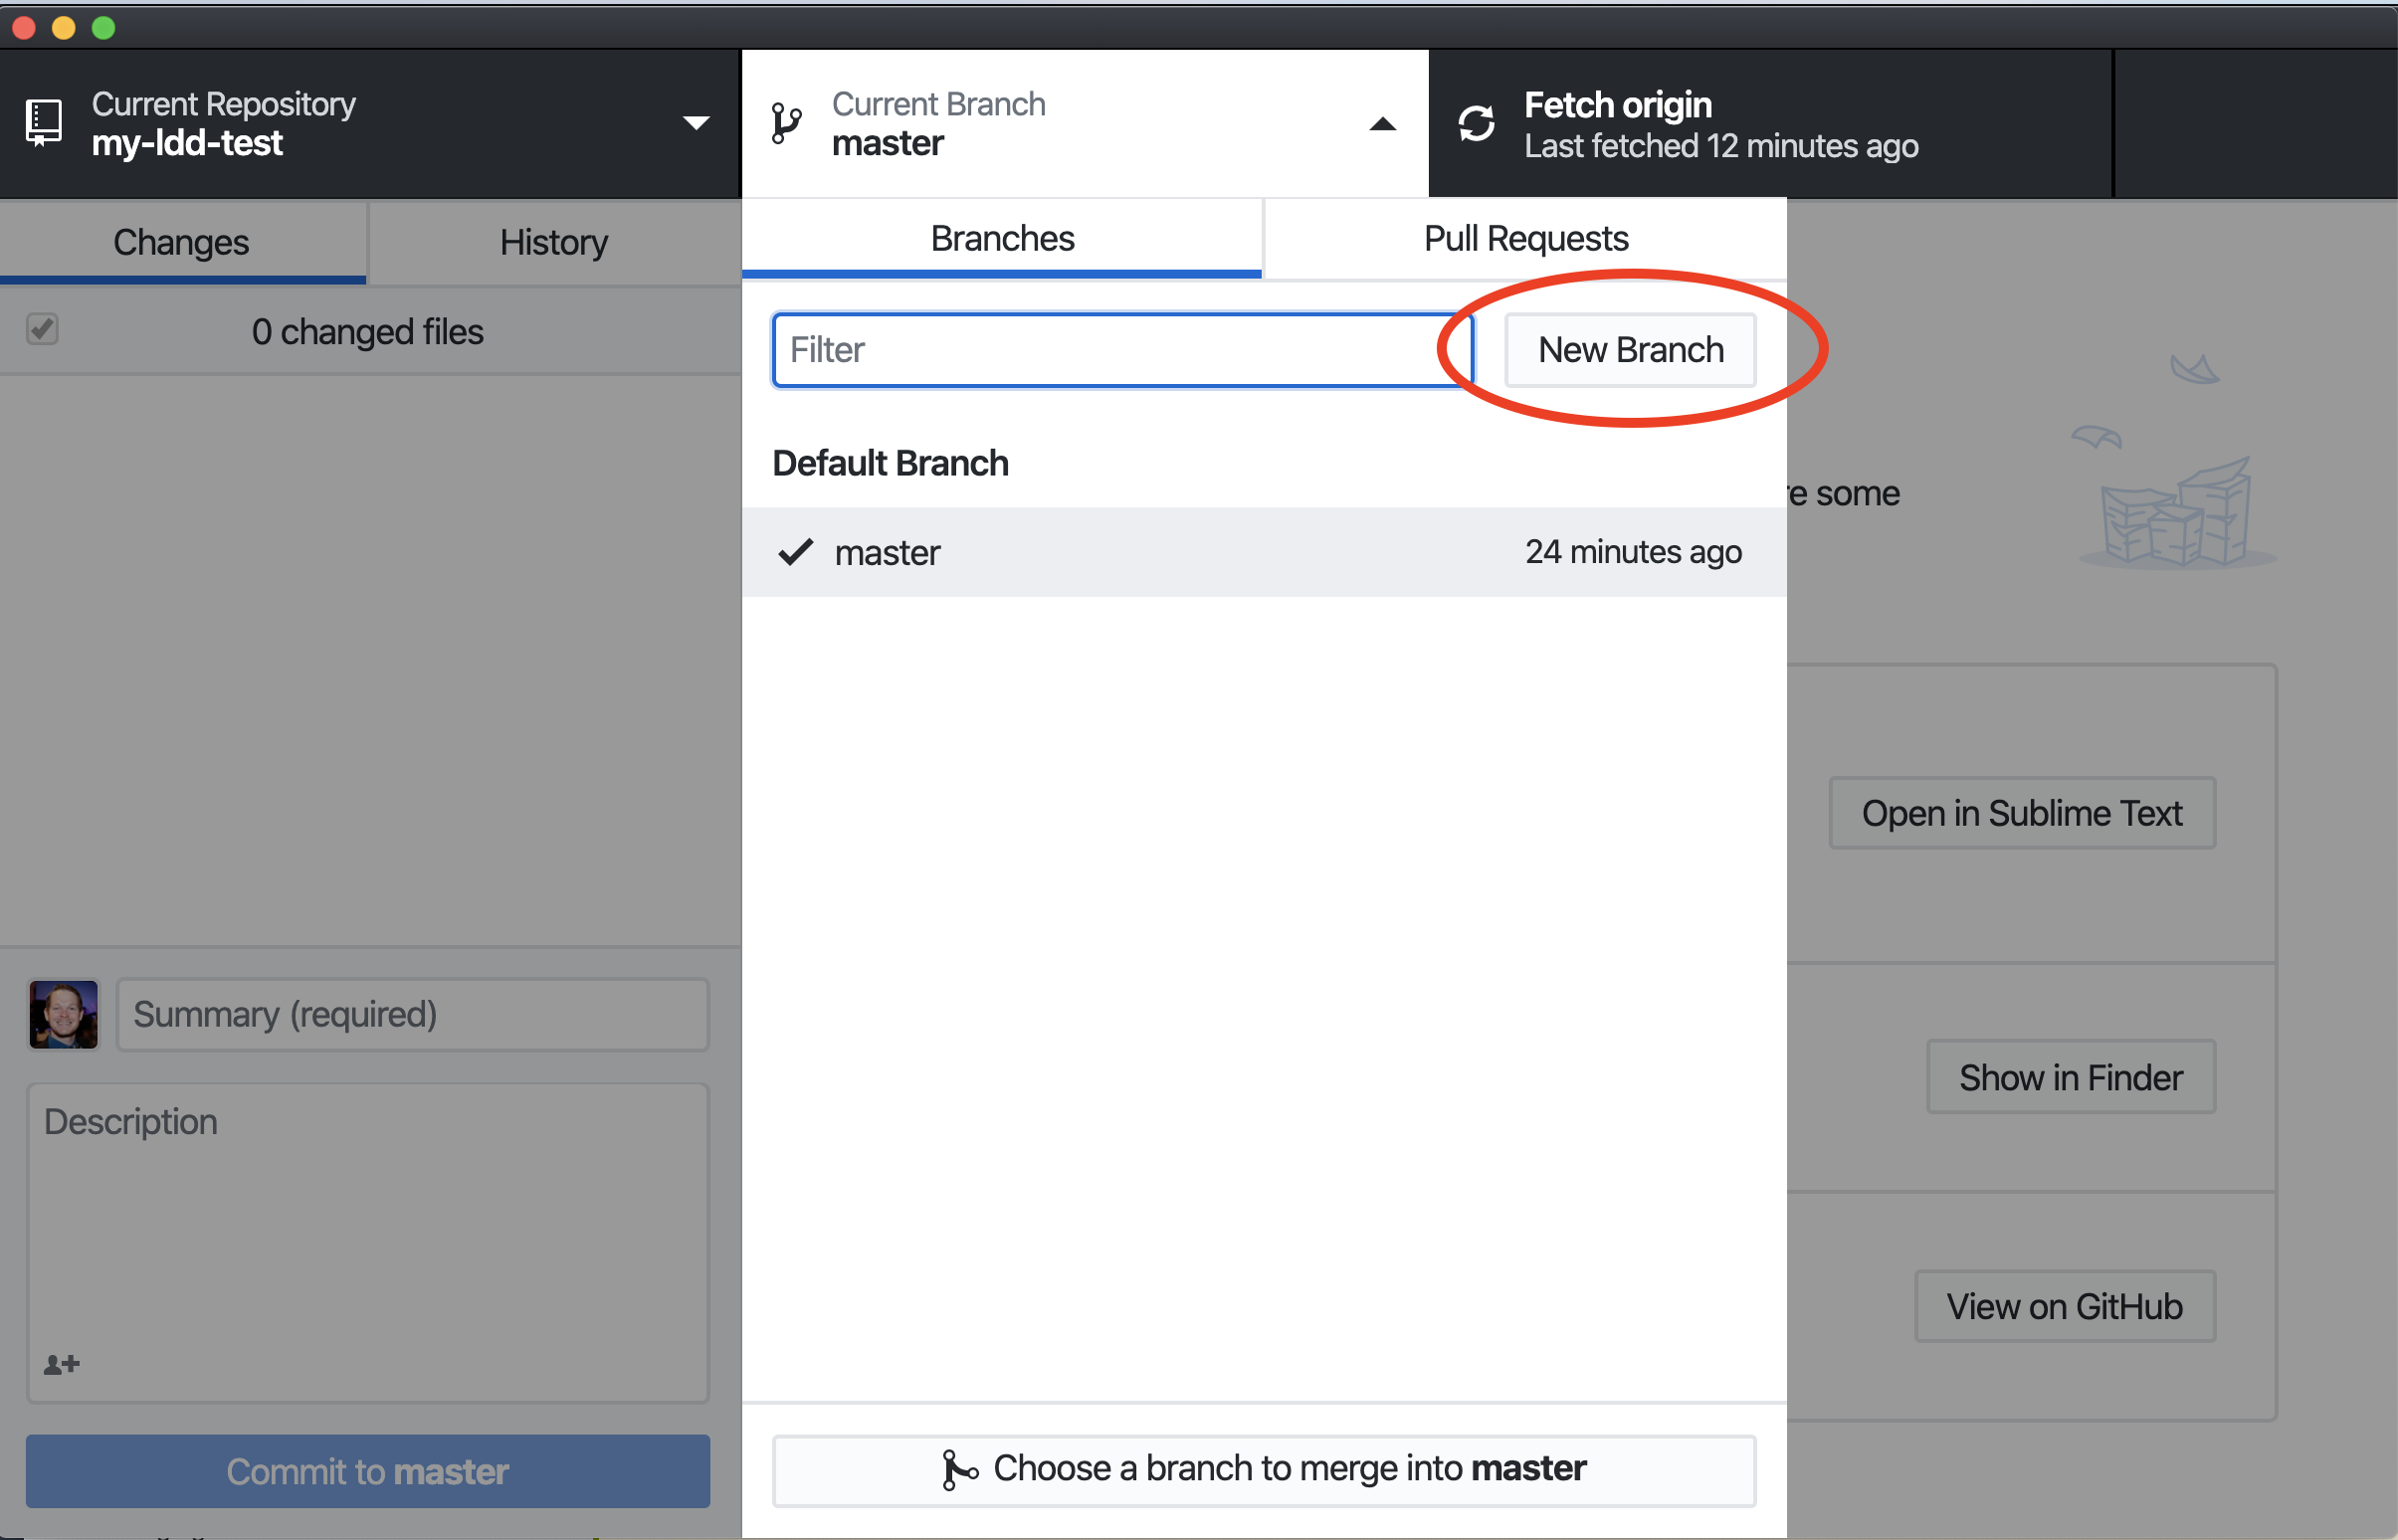
From Github Desktop, select the
Current Branchdropdown, and selectNew Branch.
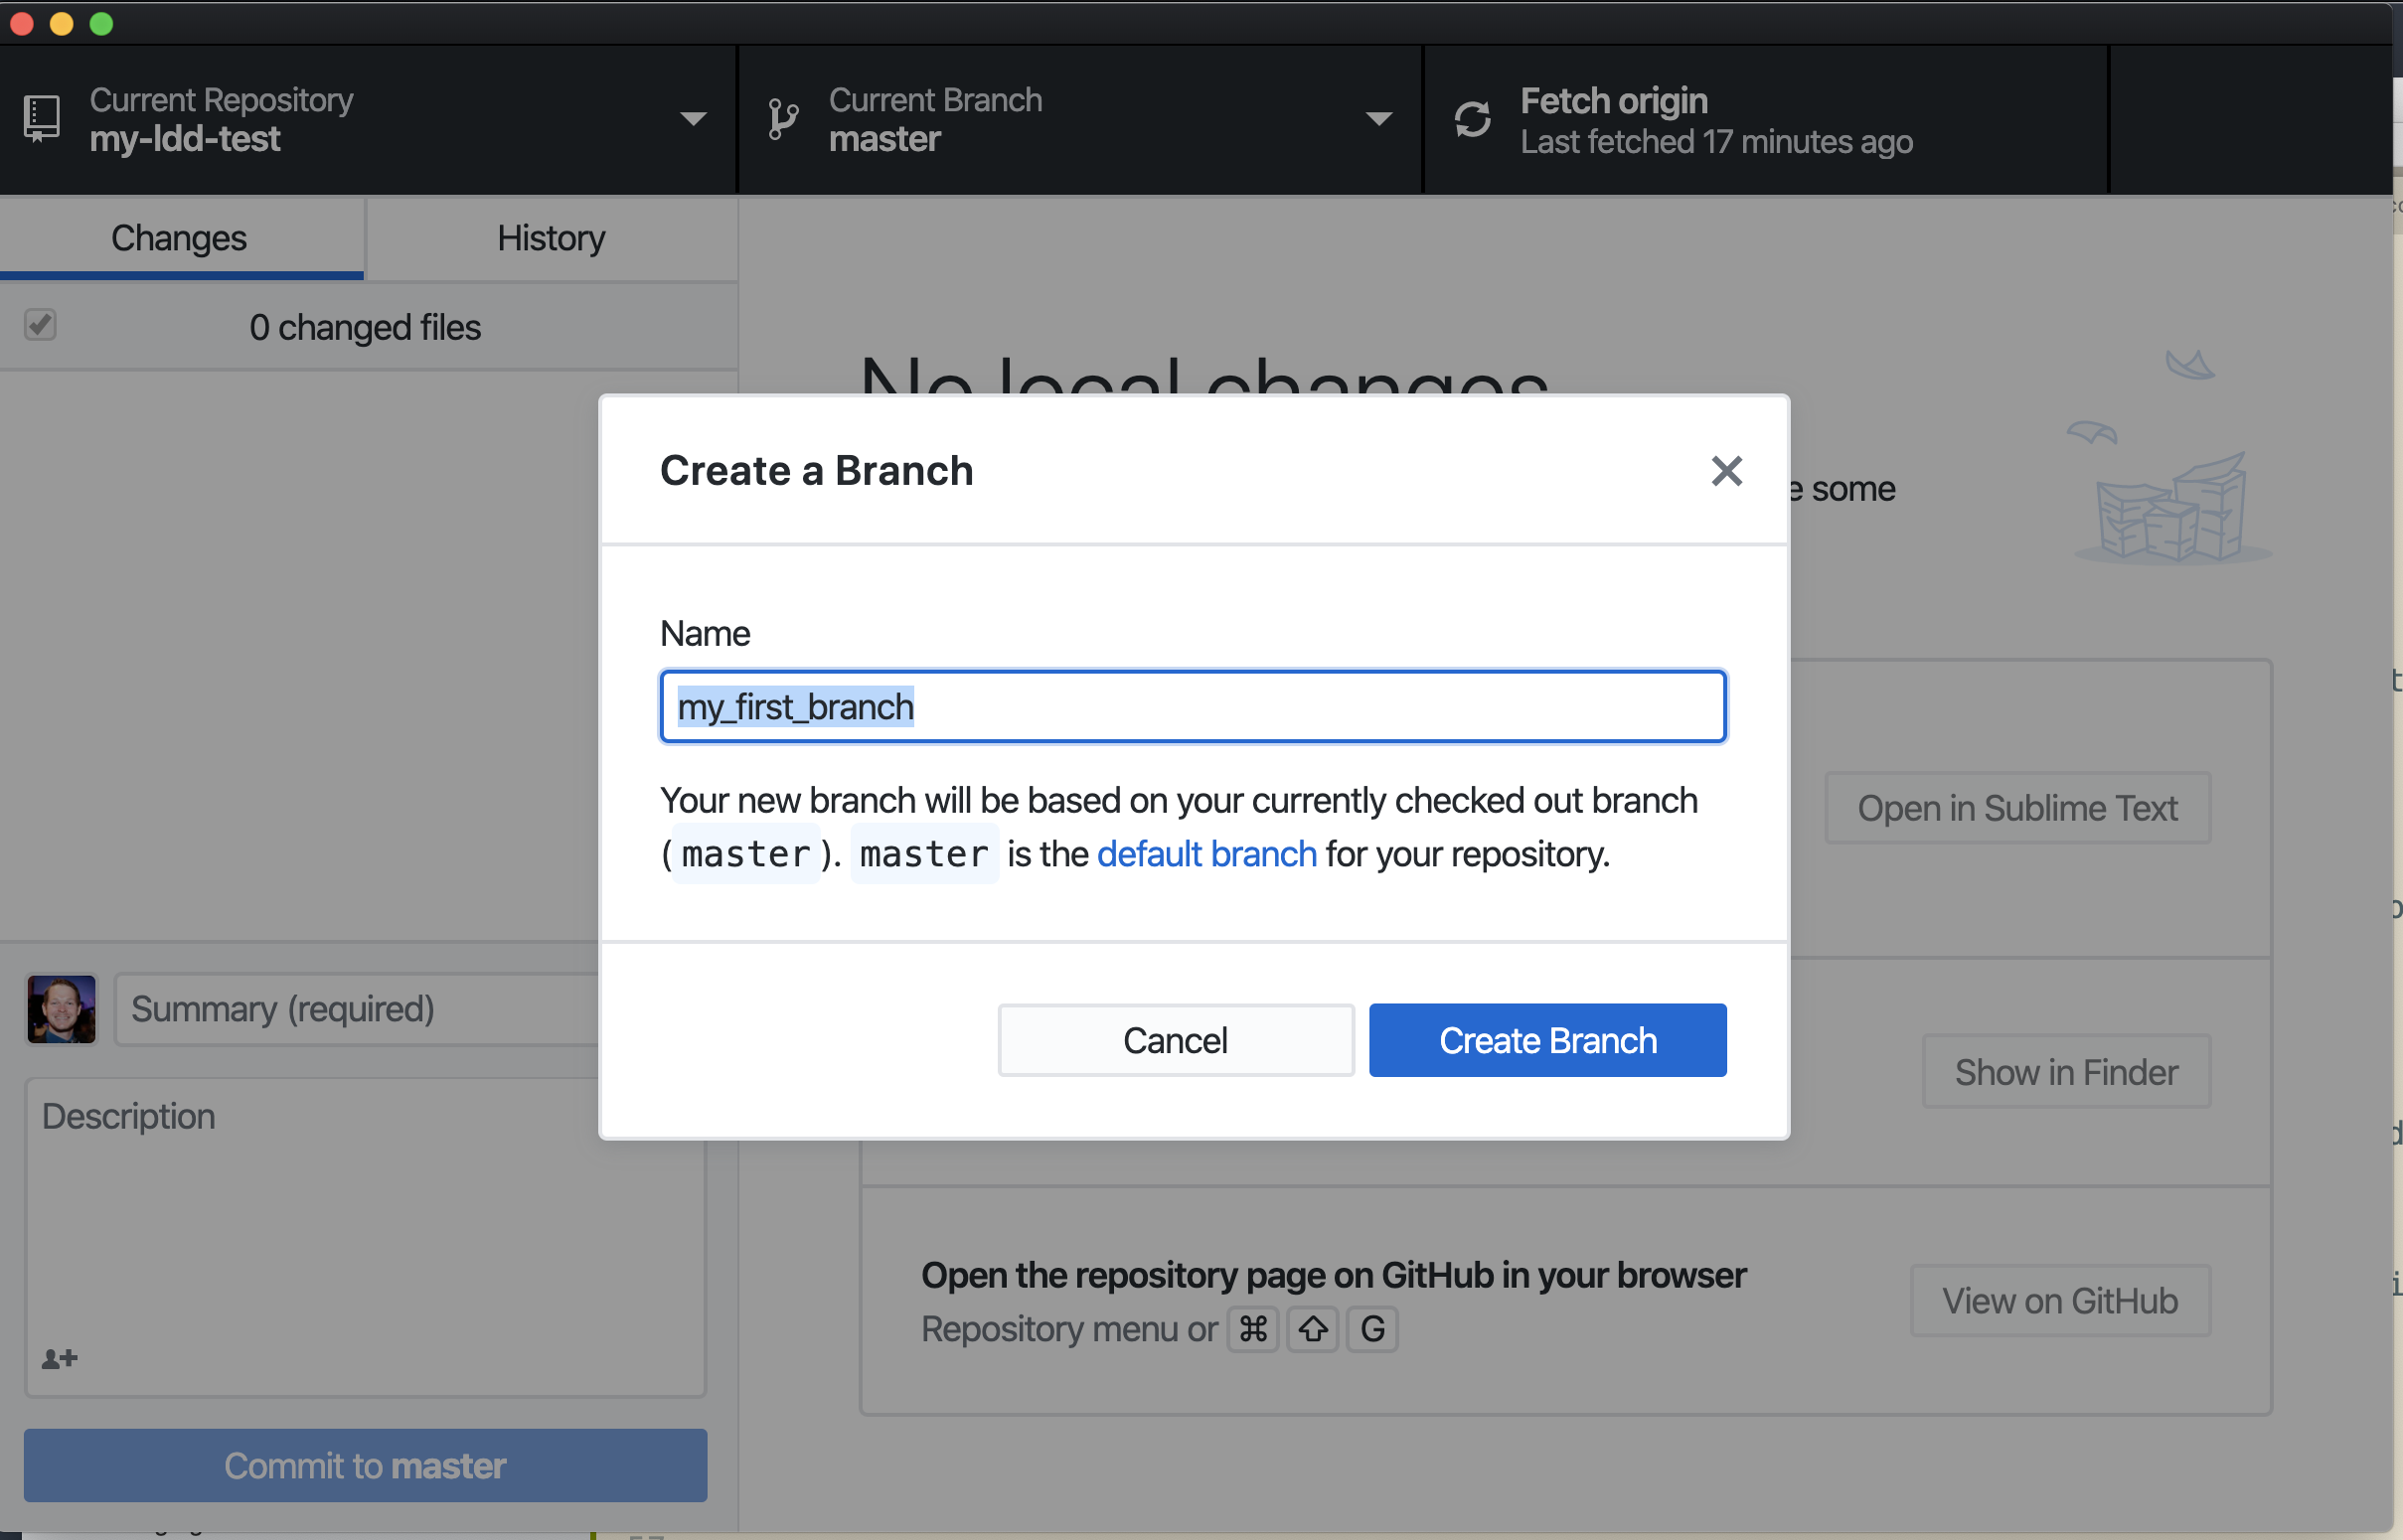
Give some name to your branch (e.g. my_first_branch) and select
Create Branch
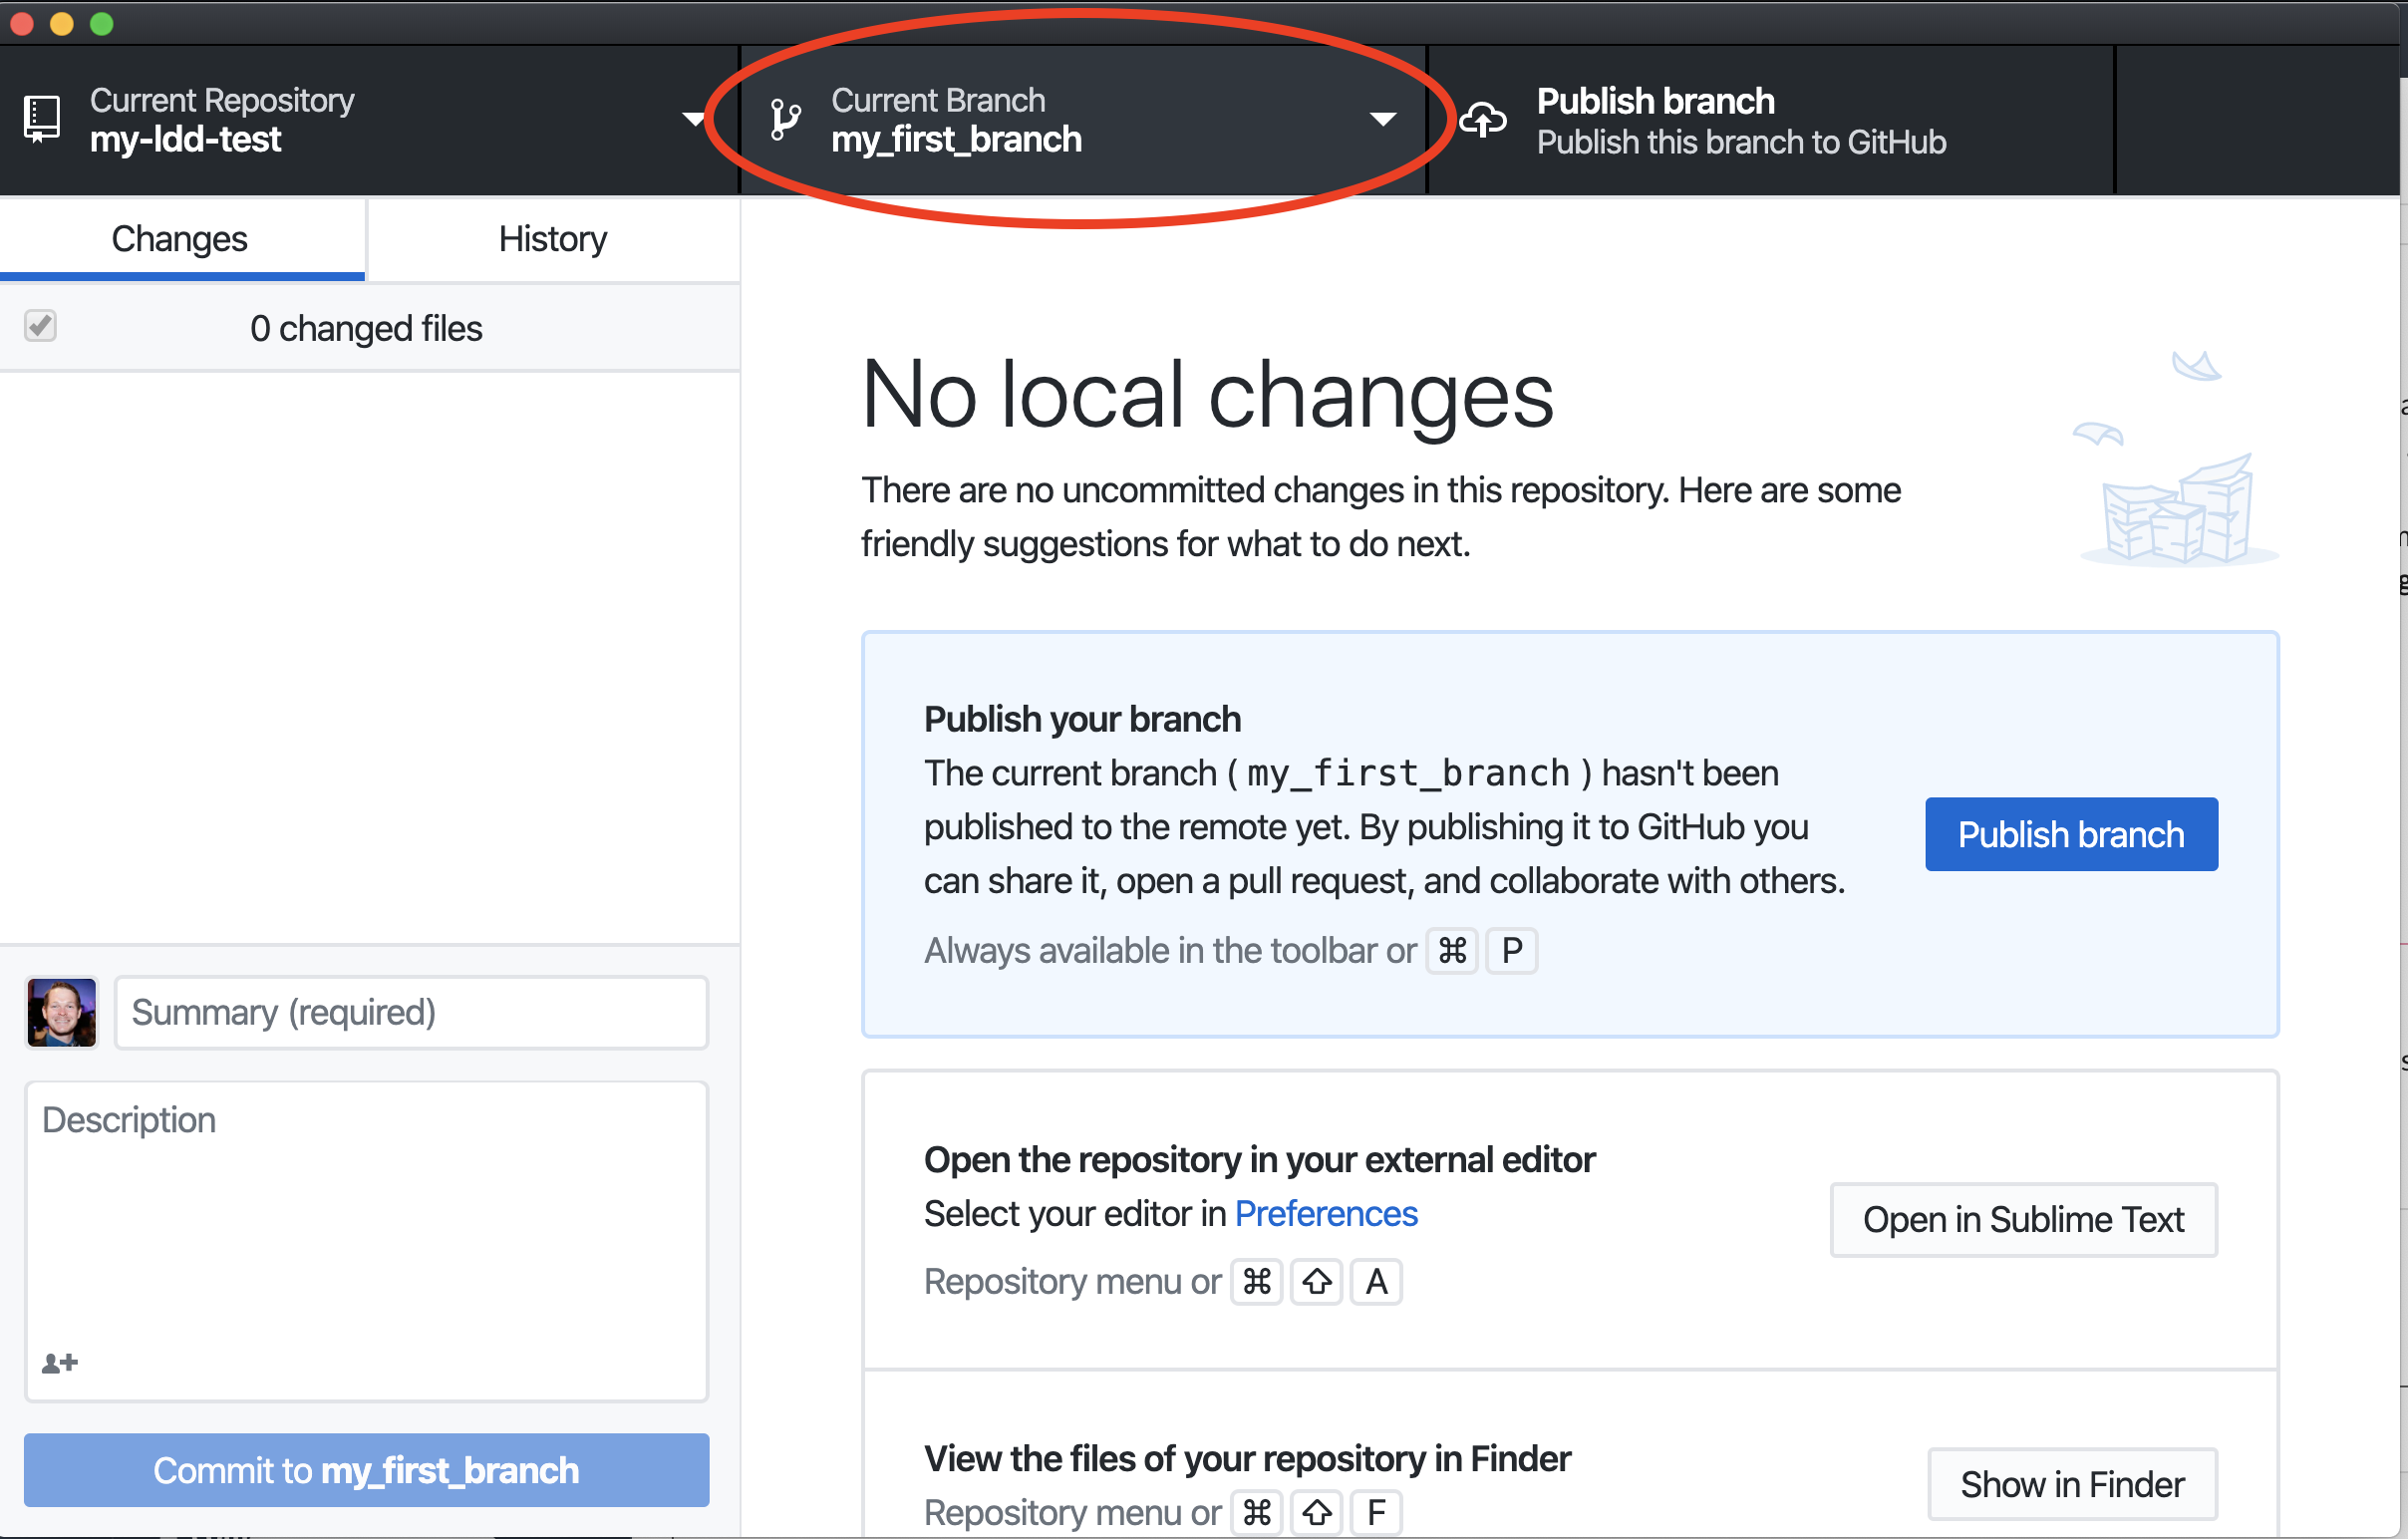
You should now be taken back to the main Github Desktop screen, and notice your
Current Branchis nowmy_first_branch.
3. Make an Update and Push to Branch
We now want to edit the IngestLDD in the repo. This file is located within your new repo under
my-ldd-test/src/PDS4_EXAMPLE_IngestLDD.xml. This file can be opened from your favorite Editor. The Github Desktop main screen should also provide a button toView the files of your repository, which will take you to the directory where the files exist on your local file system.Once you have the file open let’s make a minor change to the IngestLDD. Let’s say we made a mistake when we first created this IngestLDD, and the attribute should really be an
ASCII_Realnot anASCII_Integer. So let’s update the IngestLDD and save the file:<DD_Attribute> <name>my_first_attribute</name> <version_id>1.0</version_id> <local_identifier>my_first_attribute</local_identifier> <nillable_flag>false</nillable_flag> <submitter_name>Jane Doe</submitter_name> <definition>My first attribute </definition> <DD_Value_Domain> <enumeration_flag>false</enumeration_flag> <value_data_type>ASCII_Real</value_data_type> <---- UPDATE THIS TO ASCII_Real -----> <unit_of_measure_type>Units_of_None</unit_of_measure_type> </DD_Value_Domain> </DD_Attribute>
Go back to Github Desktop, and notice it has tracked your change.
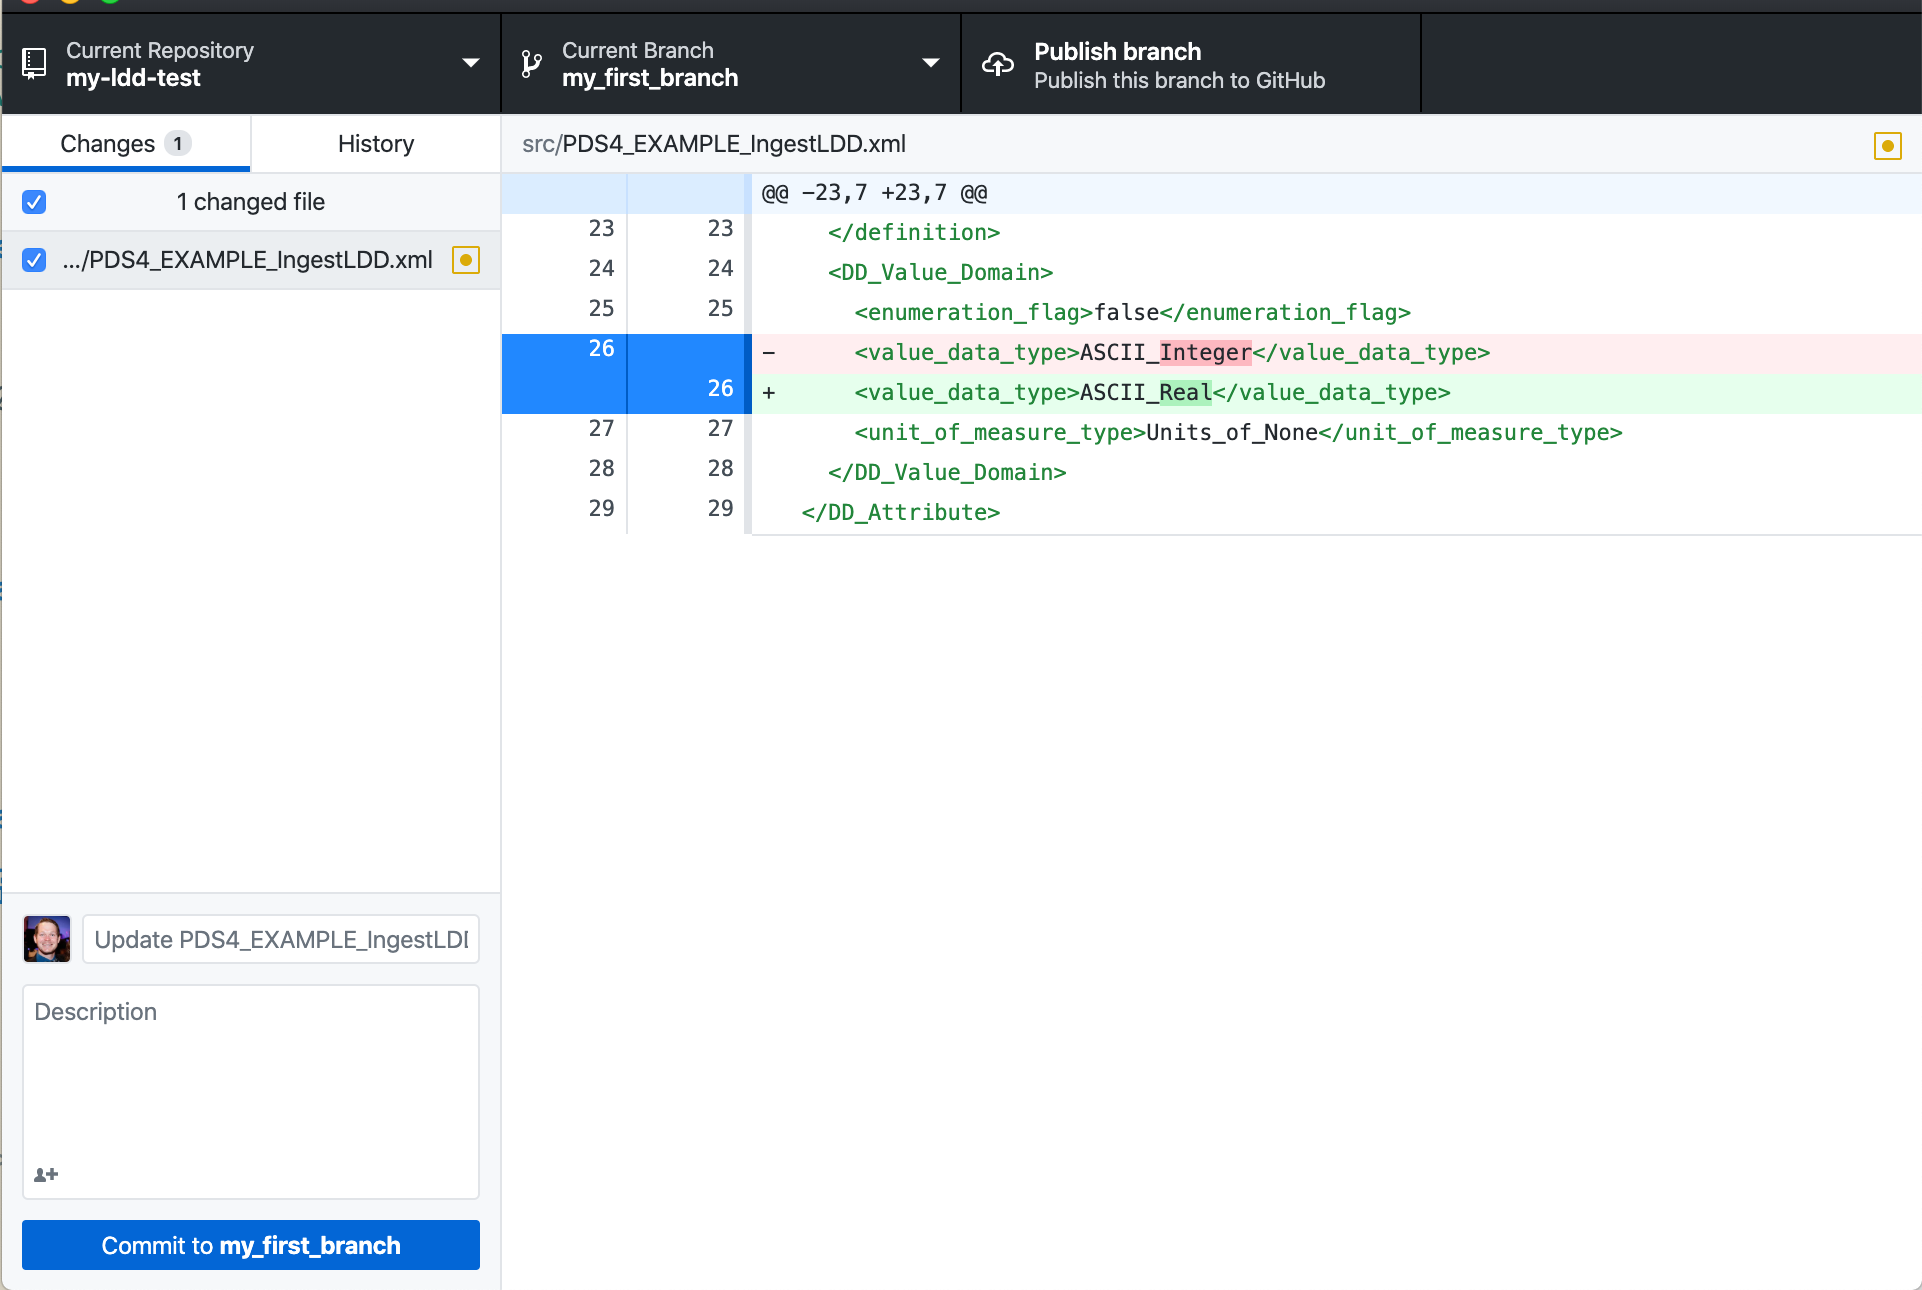
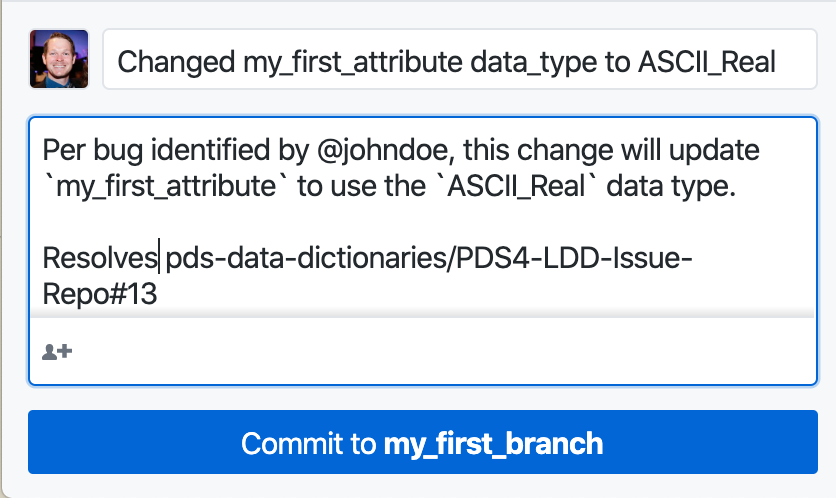
We now want to commit the change. In the bottom left corner of Github Desktop, you will see a few text boxes above the button
Commit to my_first_branch. This is where our commit messages should go. For the smaller input box, input a short summary of the change (72 chars or less). For the larger box, you can add more details, and, at minimum, reference the Github issue associated with the change. For this tutorial, we have created dummy issue to test with. That issue can be referenced by includingpds-data-dictionaries/PDS4-LDD-Issue-Repo#13in the commit text box. Once you have entered information in the text box, select theCommit to my_first_branchbutton.
Note
Commit messages are very important to ensuring traceability between the LDDs themselves, the bugs and feature requests for those LDDs, and the people providing those updates. A good commit message can go a long way to providing useful information that can help people in the future understand why changes happened and what the changes were intended to do. For more information on commit messages, so our PDS Commit Message Best Practices
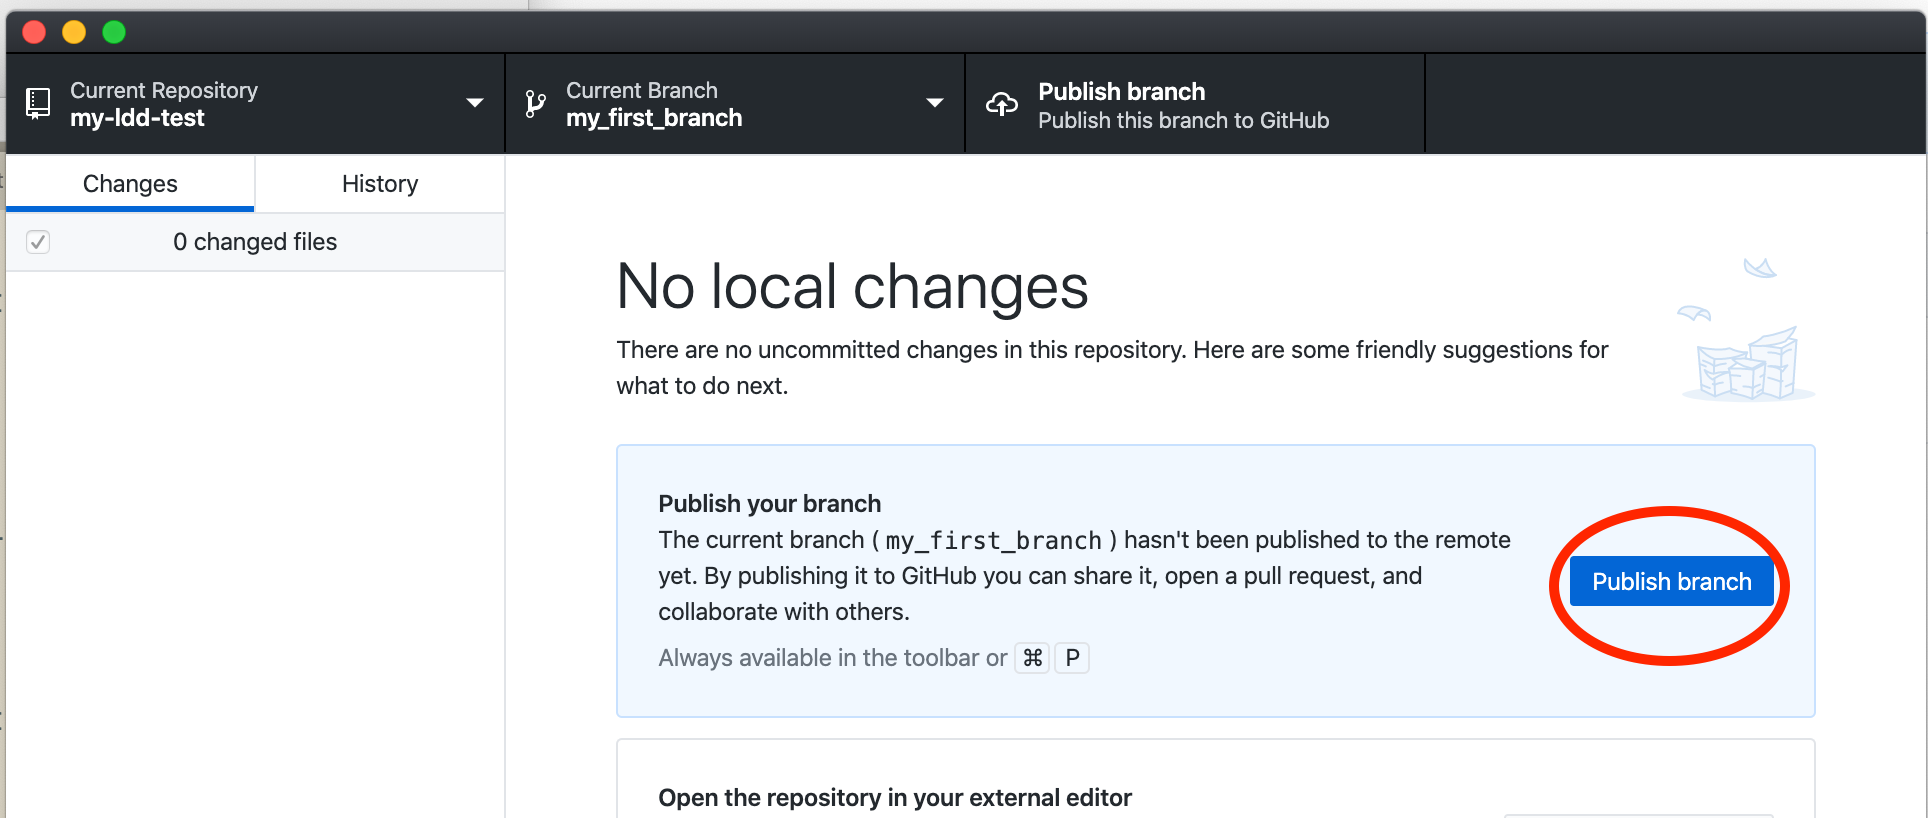
The changes have been committed to your local branch, but have NOT been pushed to the public Github.com. Select
Publish Branchto push the branch to Github (NOTE: If you have already published your branch, this may also sayPush Origin).
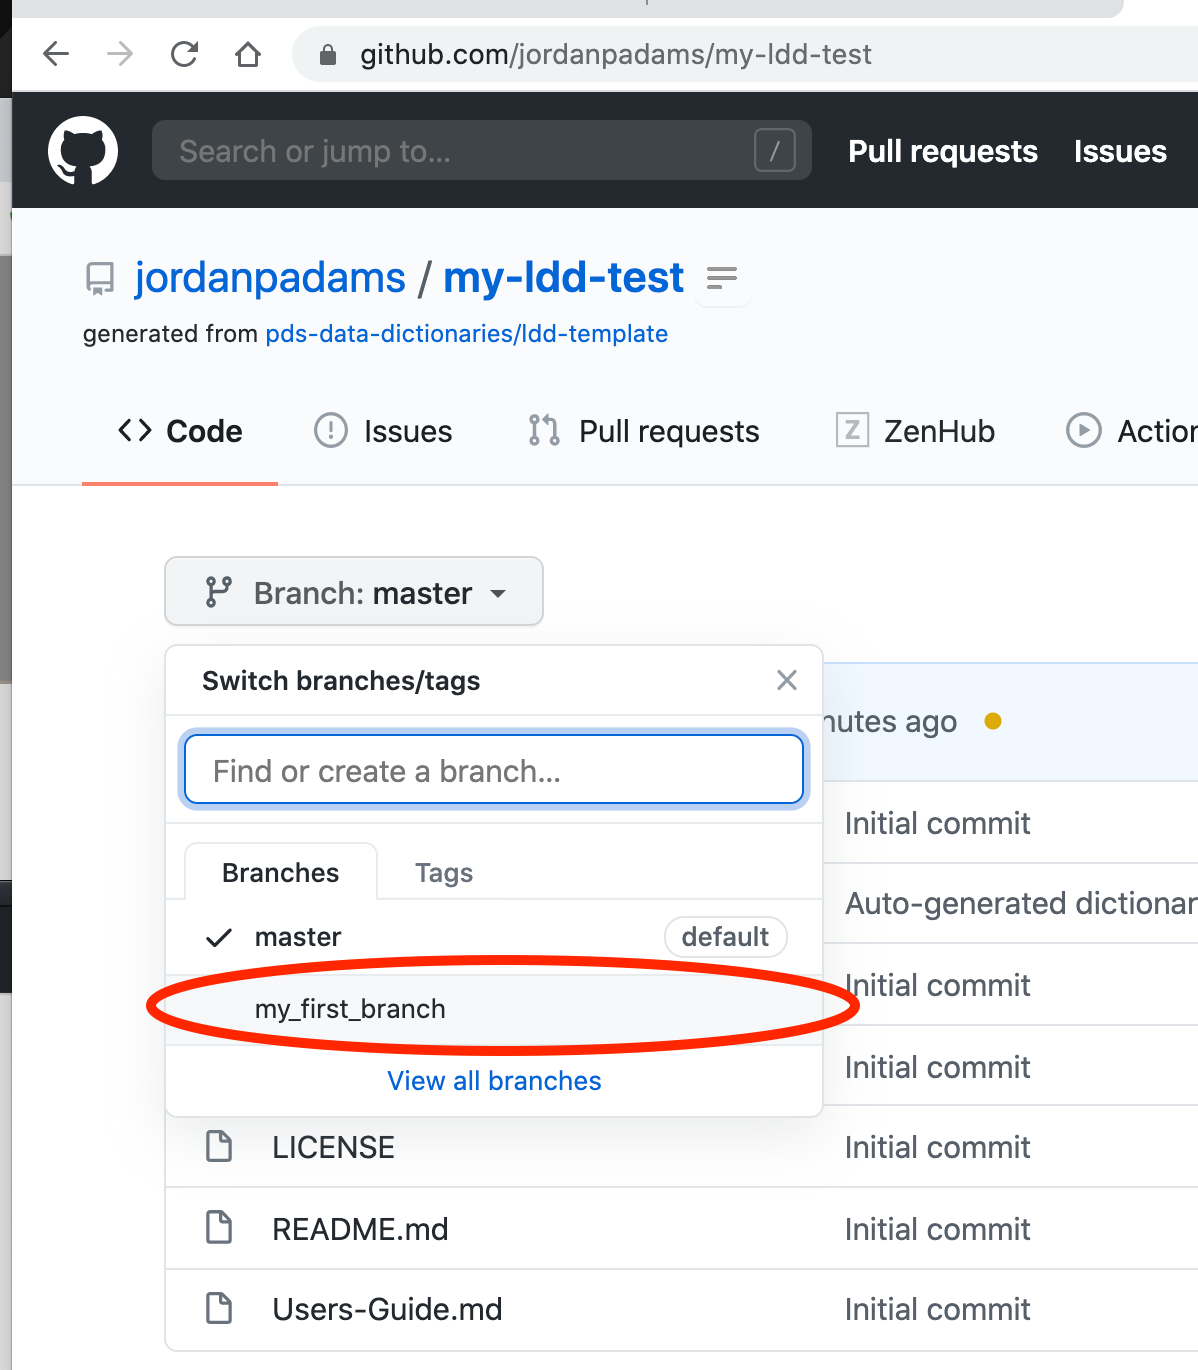
You should now be able to go to Github.com and see you’re branch there (e.g. https://github.com/jordanpadams/my-ldd-test/tree/my_first_branch).
Note
An important takeway here is that creating the branch on your local system in Github Desktop does NOT mean it is made public. You must always push your changes to Github.com in order for them to take affect.
You can also go to the dummy issue in Github and see that your commit should now be referenced there (refresh the page if you were already there). This shows the power of including issue references in your tickets.
4. Continuous Integration with Github Actions
What you may not have noticed was once you pushed to that branch, a Github Action was executed to auto-generate your LDD.
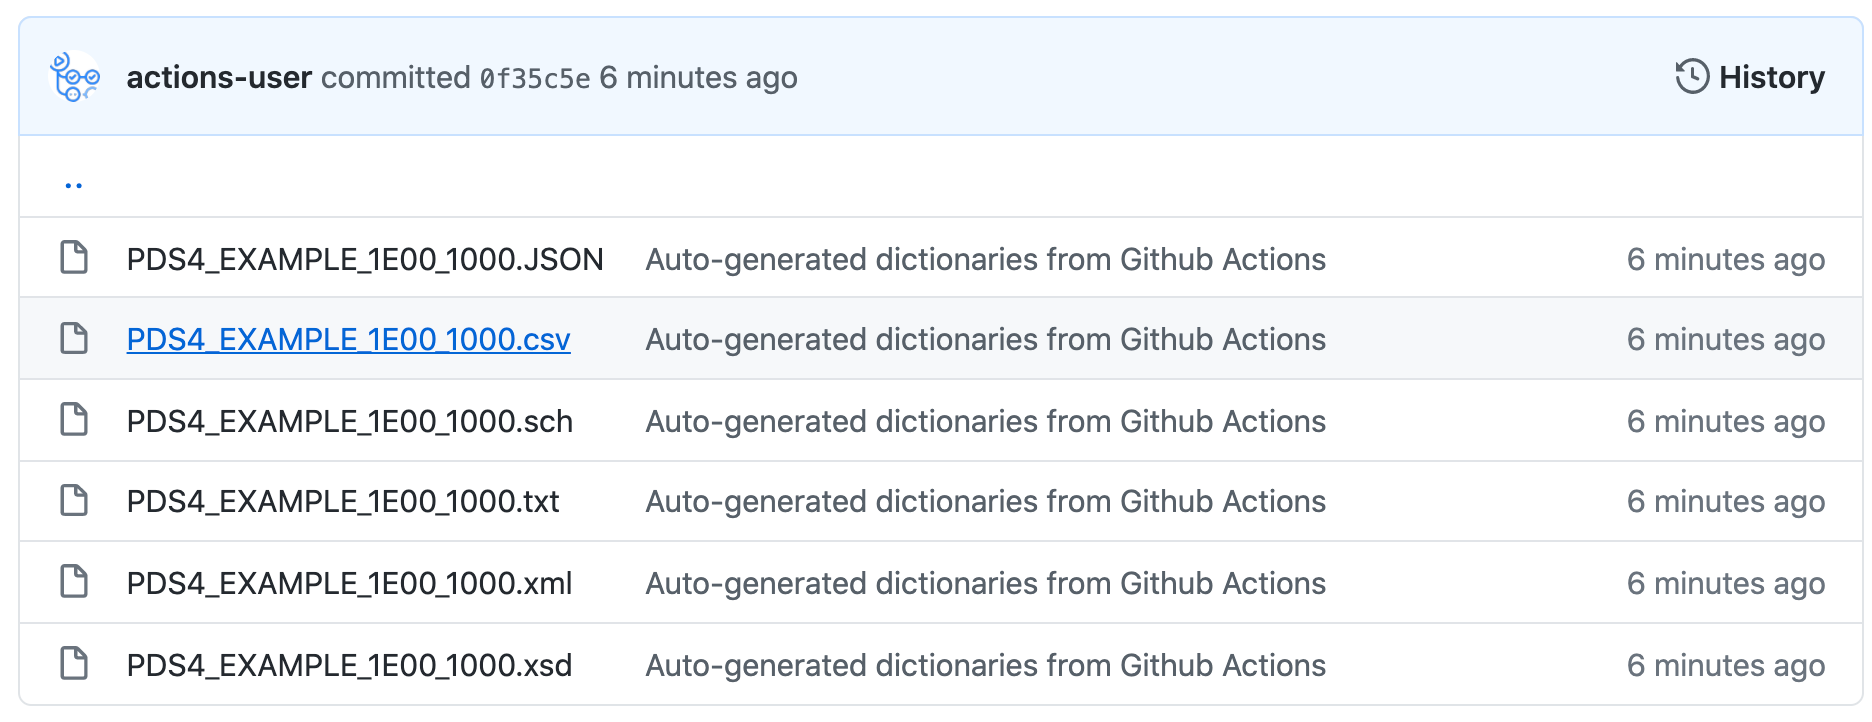
First, if you go to your branch, e.g. https://github.com/jordanpadams/my-ldd-test/tree/my_first_branch, and then click on the
build/development/GITHUB_SHAdirectory. You should see something like the following where the schema, schematron, and other files normally output by LDDTool are now mysteriously in this directory:
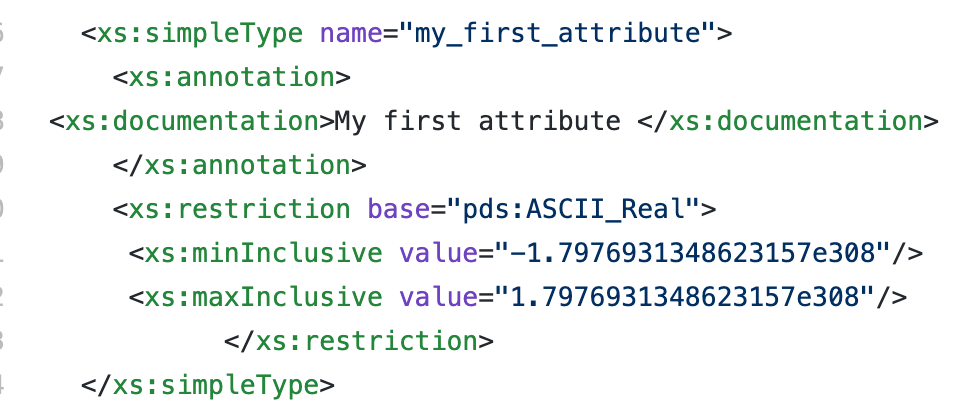
You can then open the XSD and see that the type has now changed for the attribute:
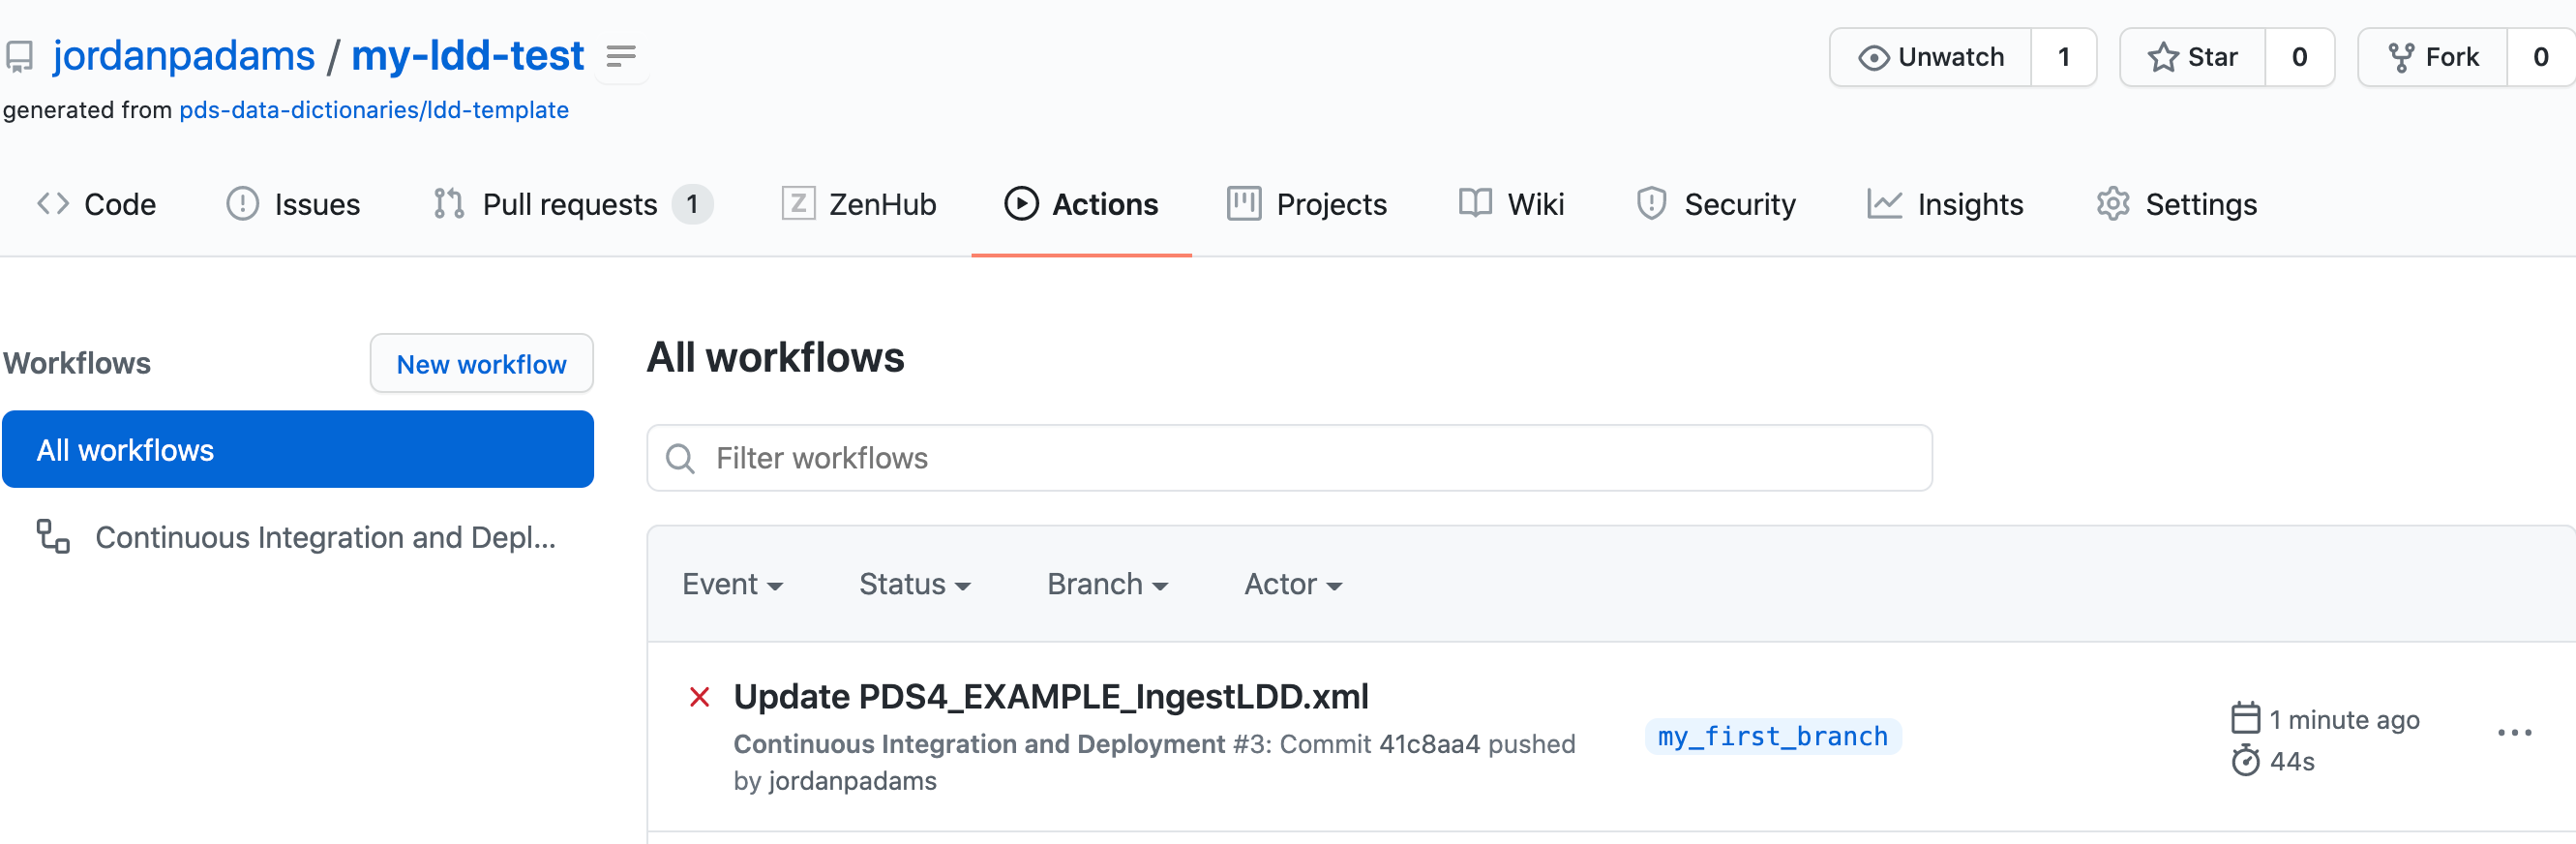
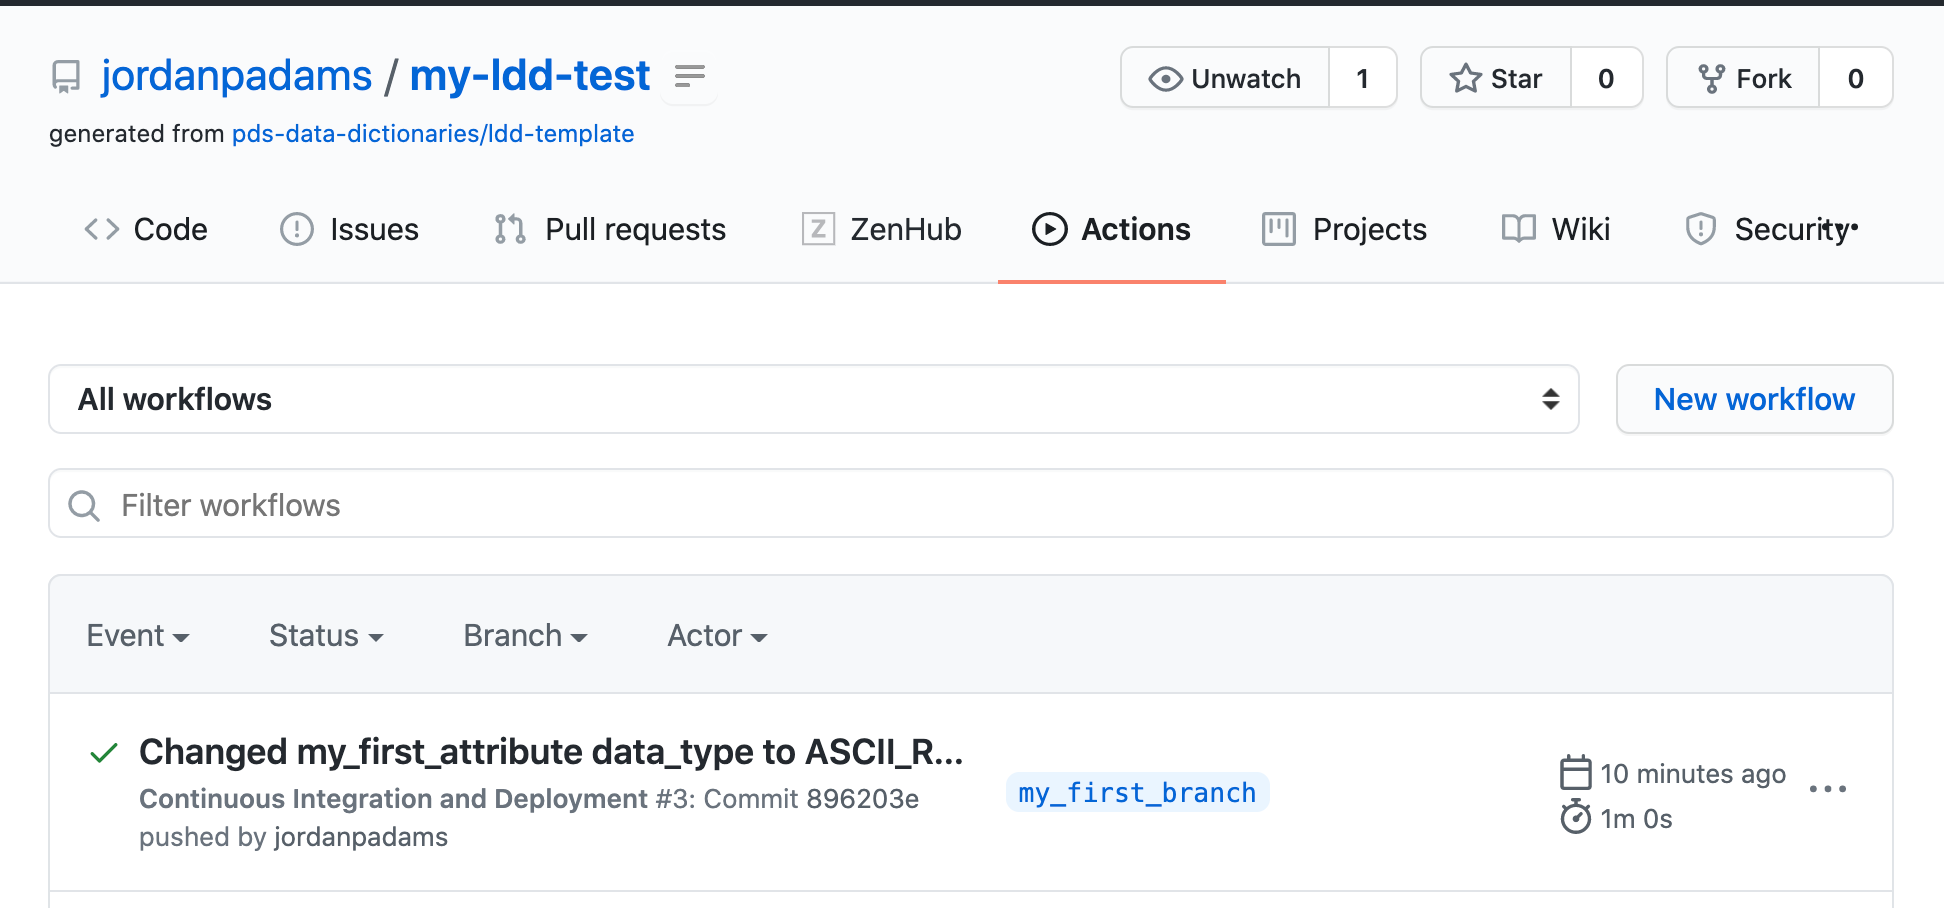
But all you did was update the IngestLDD file, how did this happen? Along the tabs towards the top of the page, select
Actions, and you should see something like this:
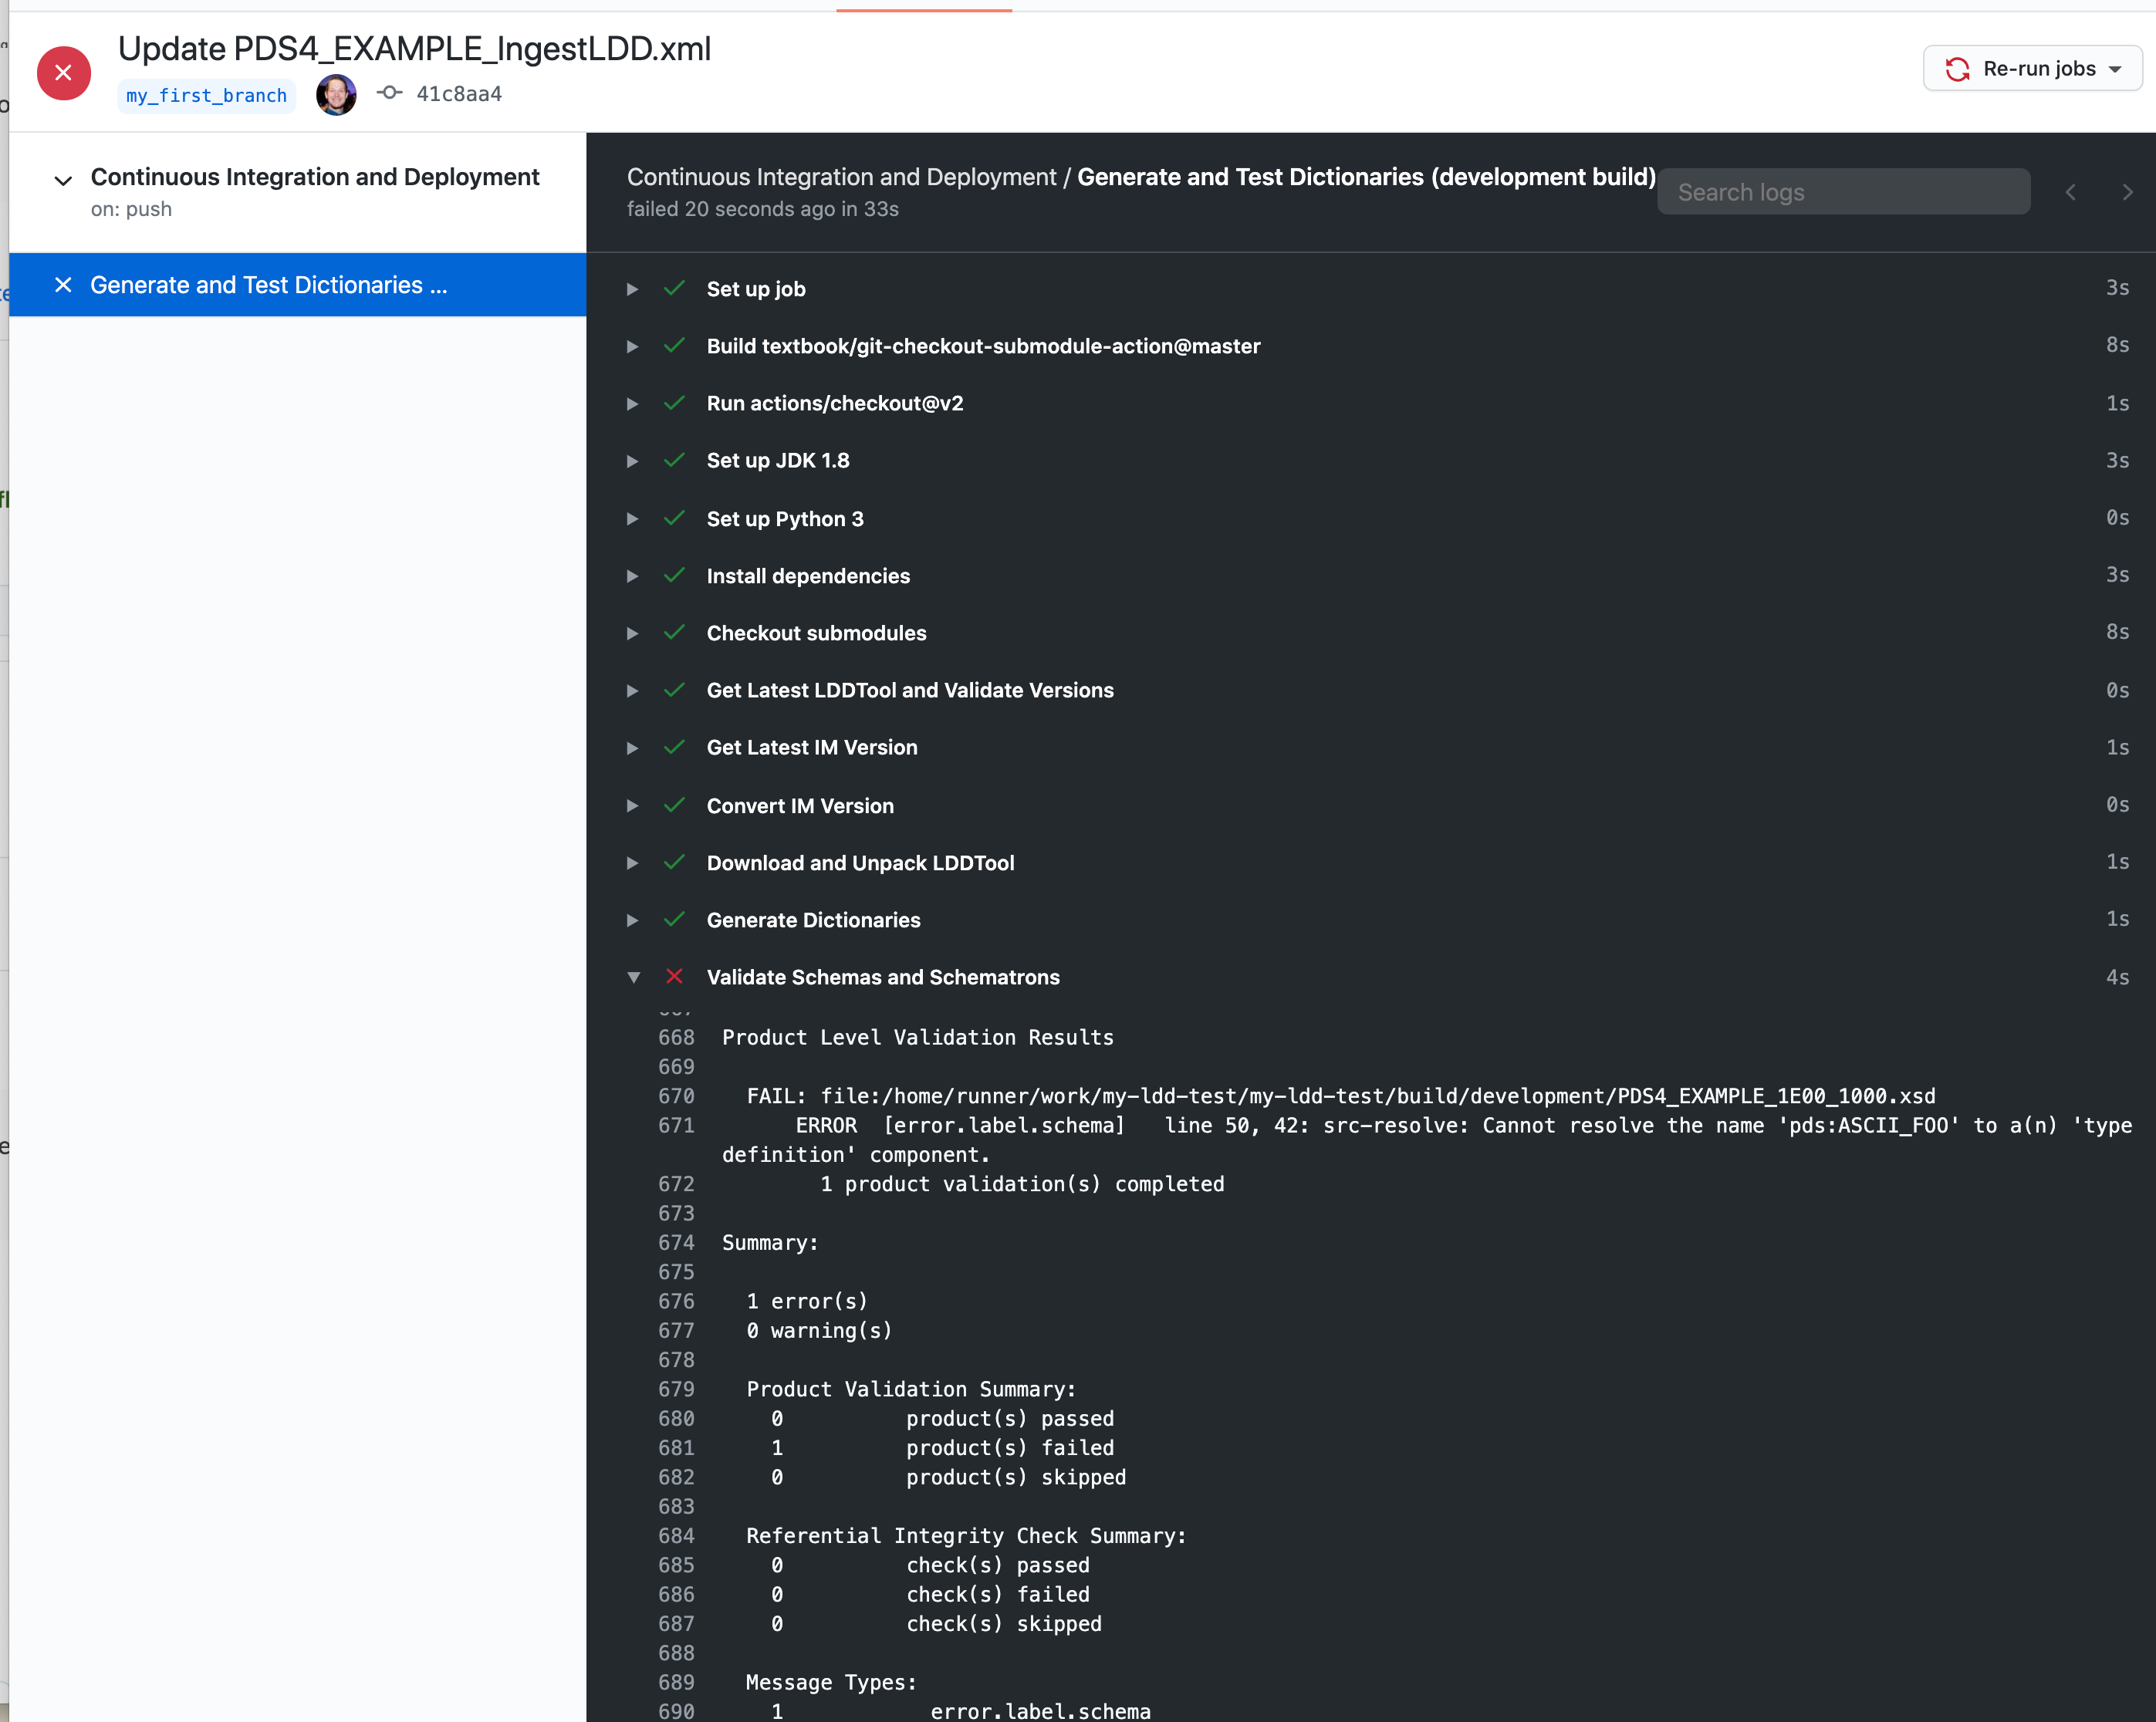
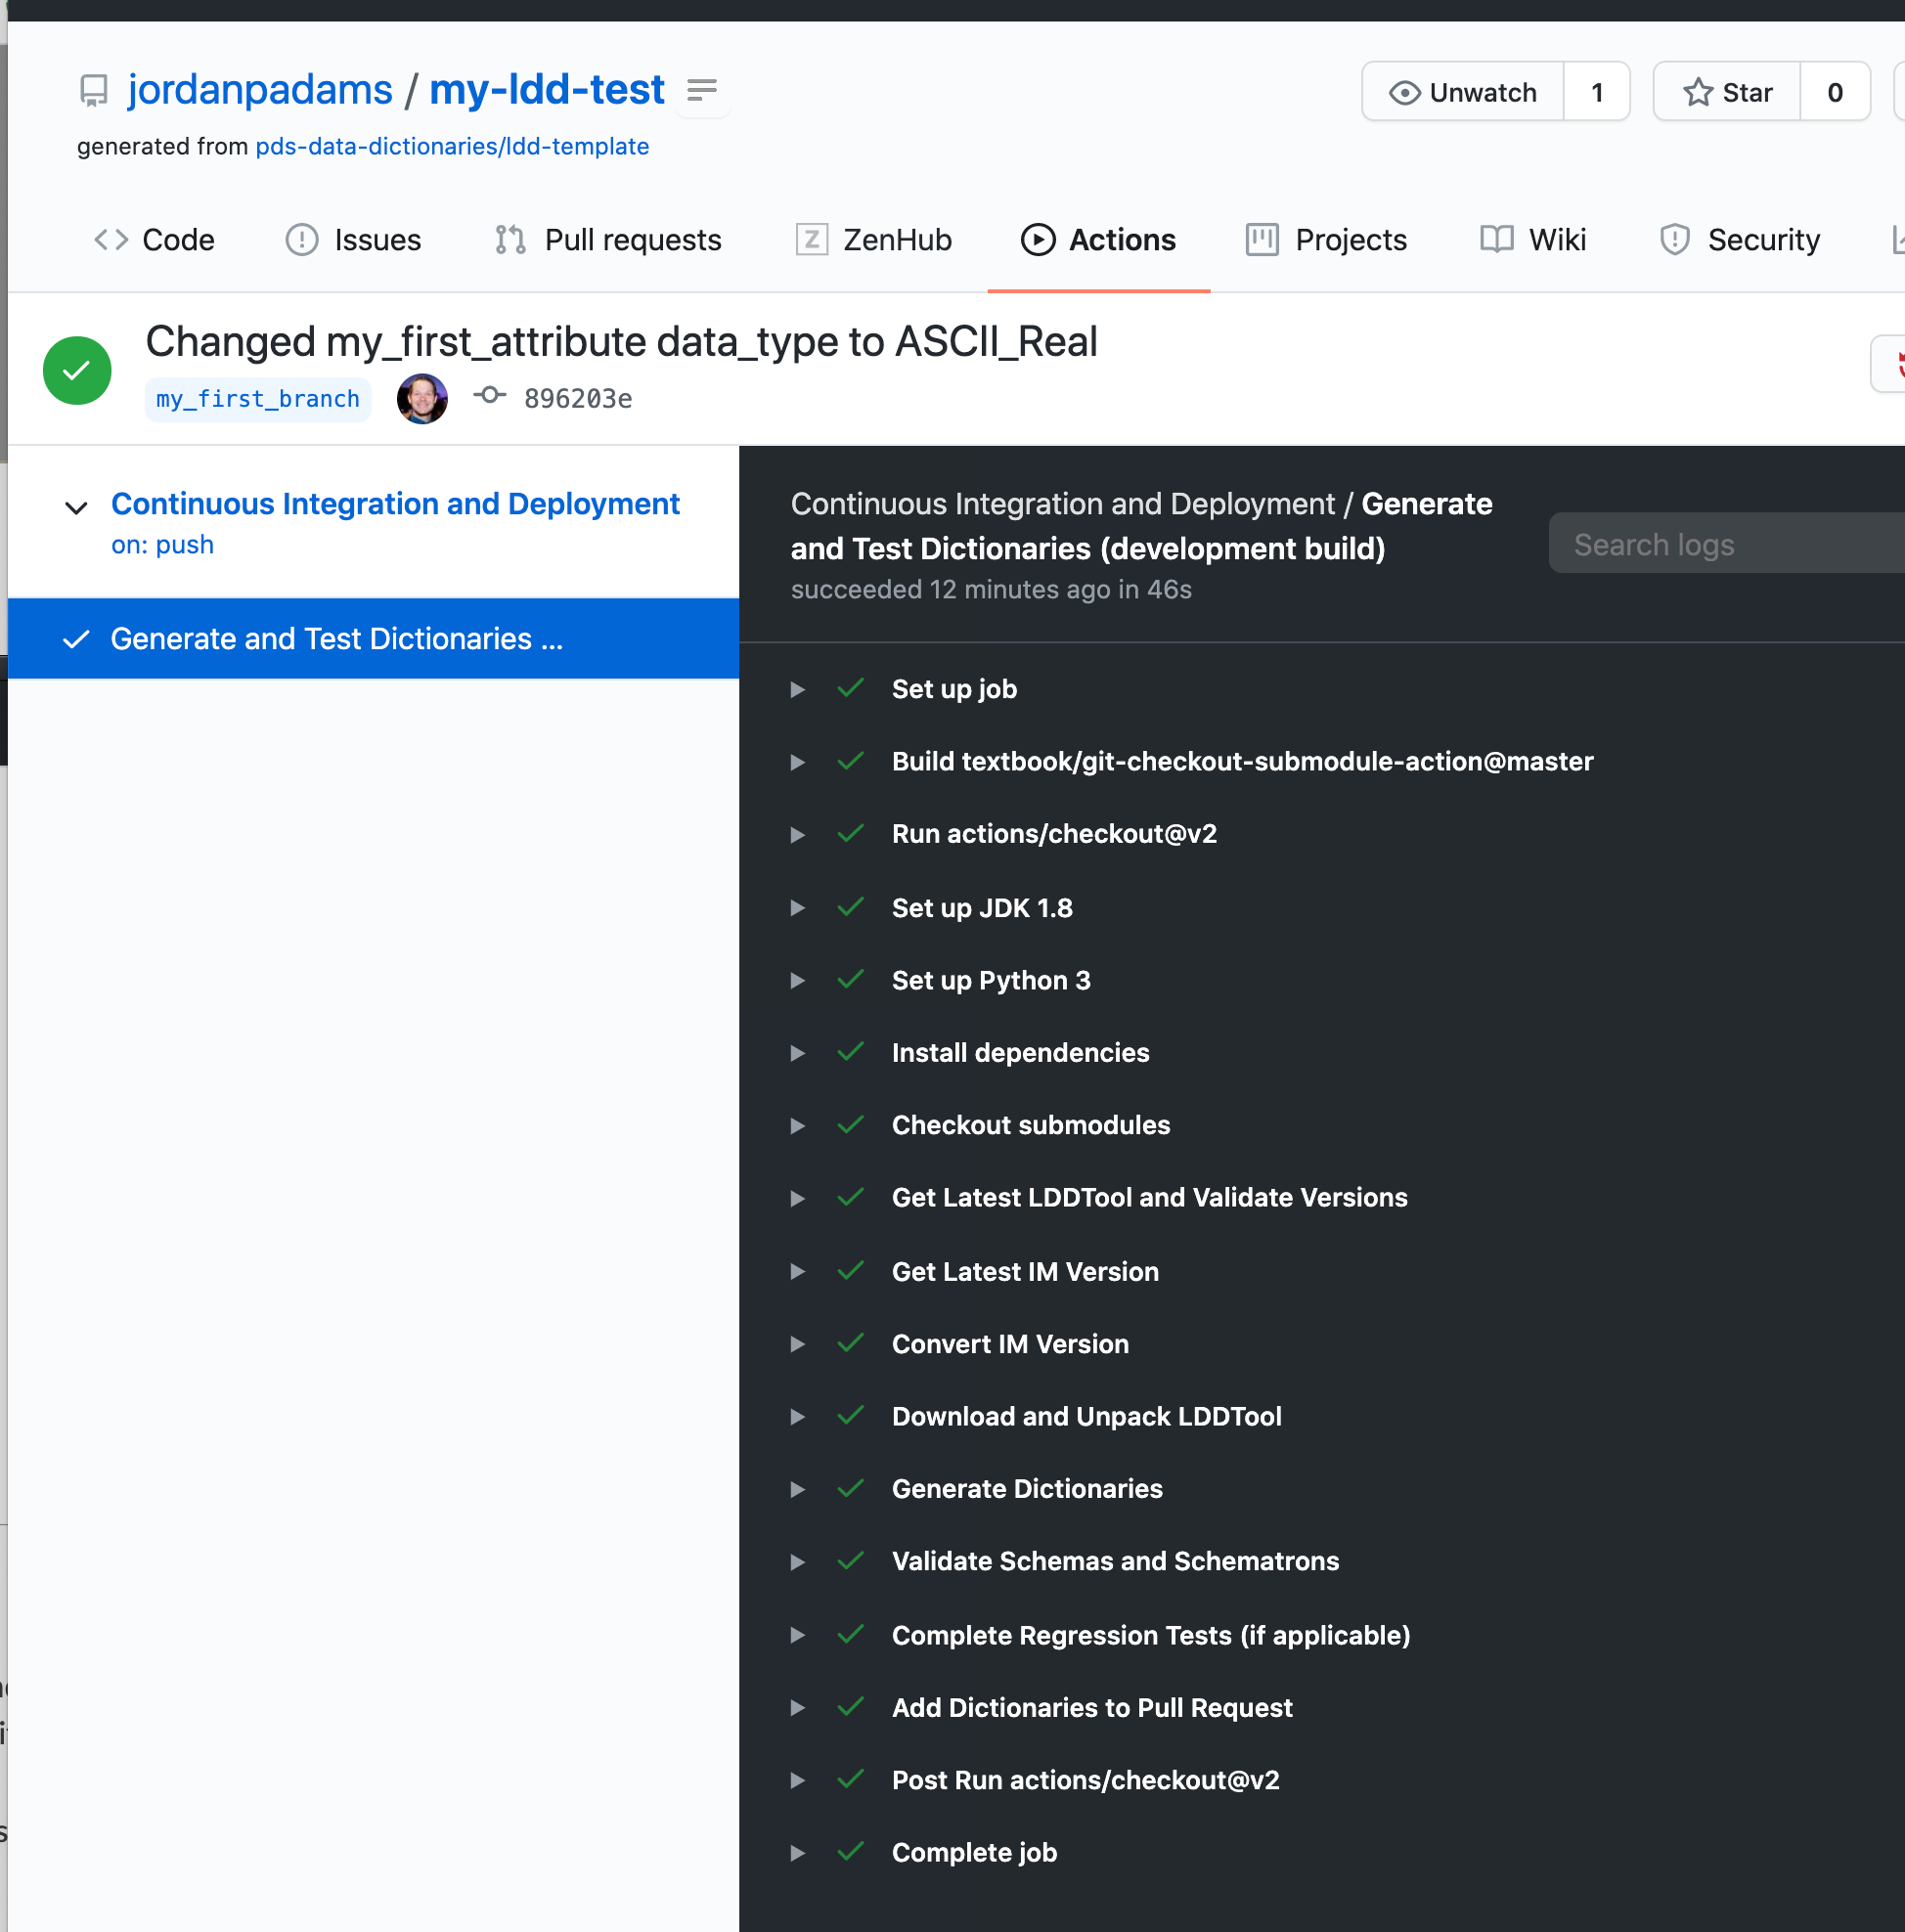
If you click the top link for your commit, and then
Generate and Test Dictionaries ...along the left sidebar, you can see the steps completed in the pipeline (note these steps are subject to change so this image may become out of date):
Note
Every time you push an update to a branch, dictionaries will be auto-generated, basic validation to ensure the XSD and SCH generated are valid, and regression testing if tests exist in the test/ directory of your repo. See LDD Build Process and LDD Regression Testing
5. Refresh Your Local Branch
Warning
It is very important that you perform a refresh of your branches prior to making any additional updates to your local files. If not, you can run into merge conflicts, which can become a real headache.
Back to Github Desktop, select
Fetch Originto see if your branch has been updated.
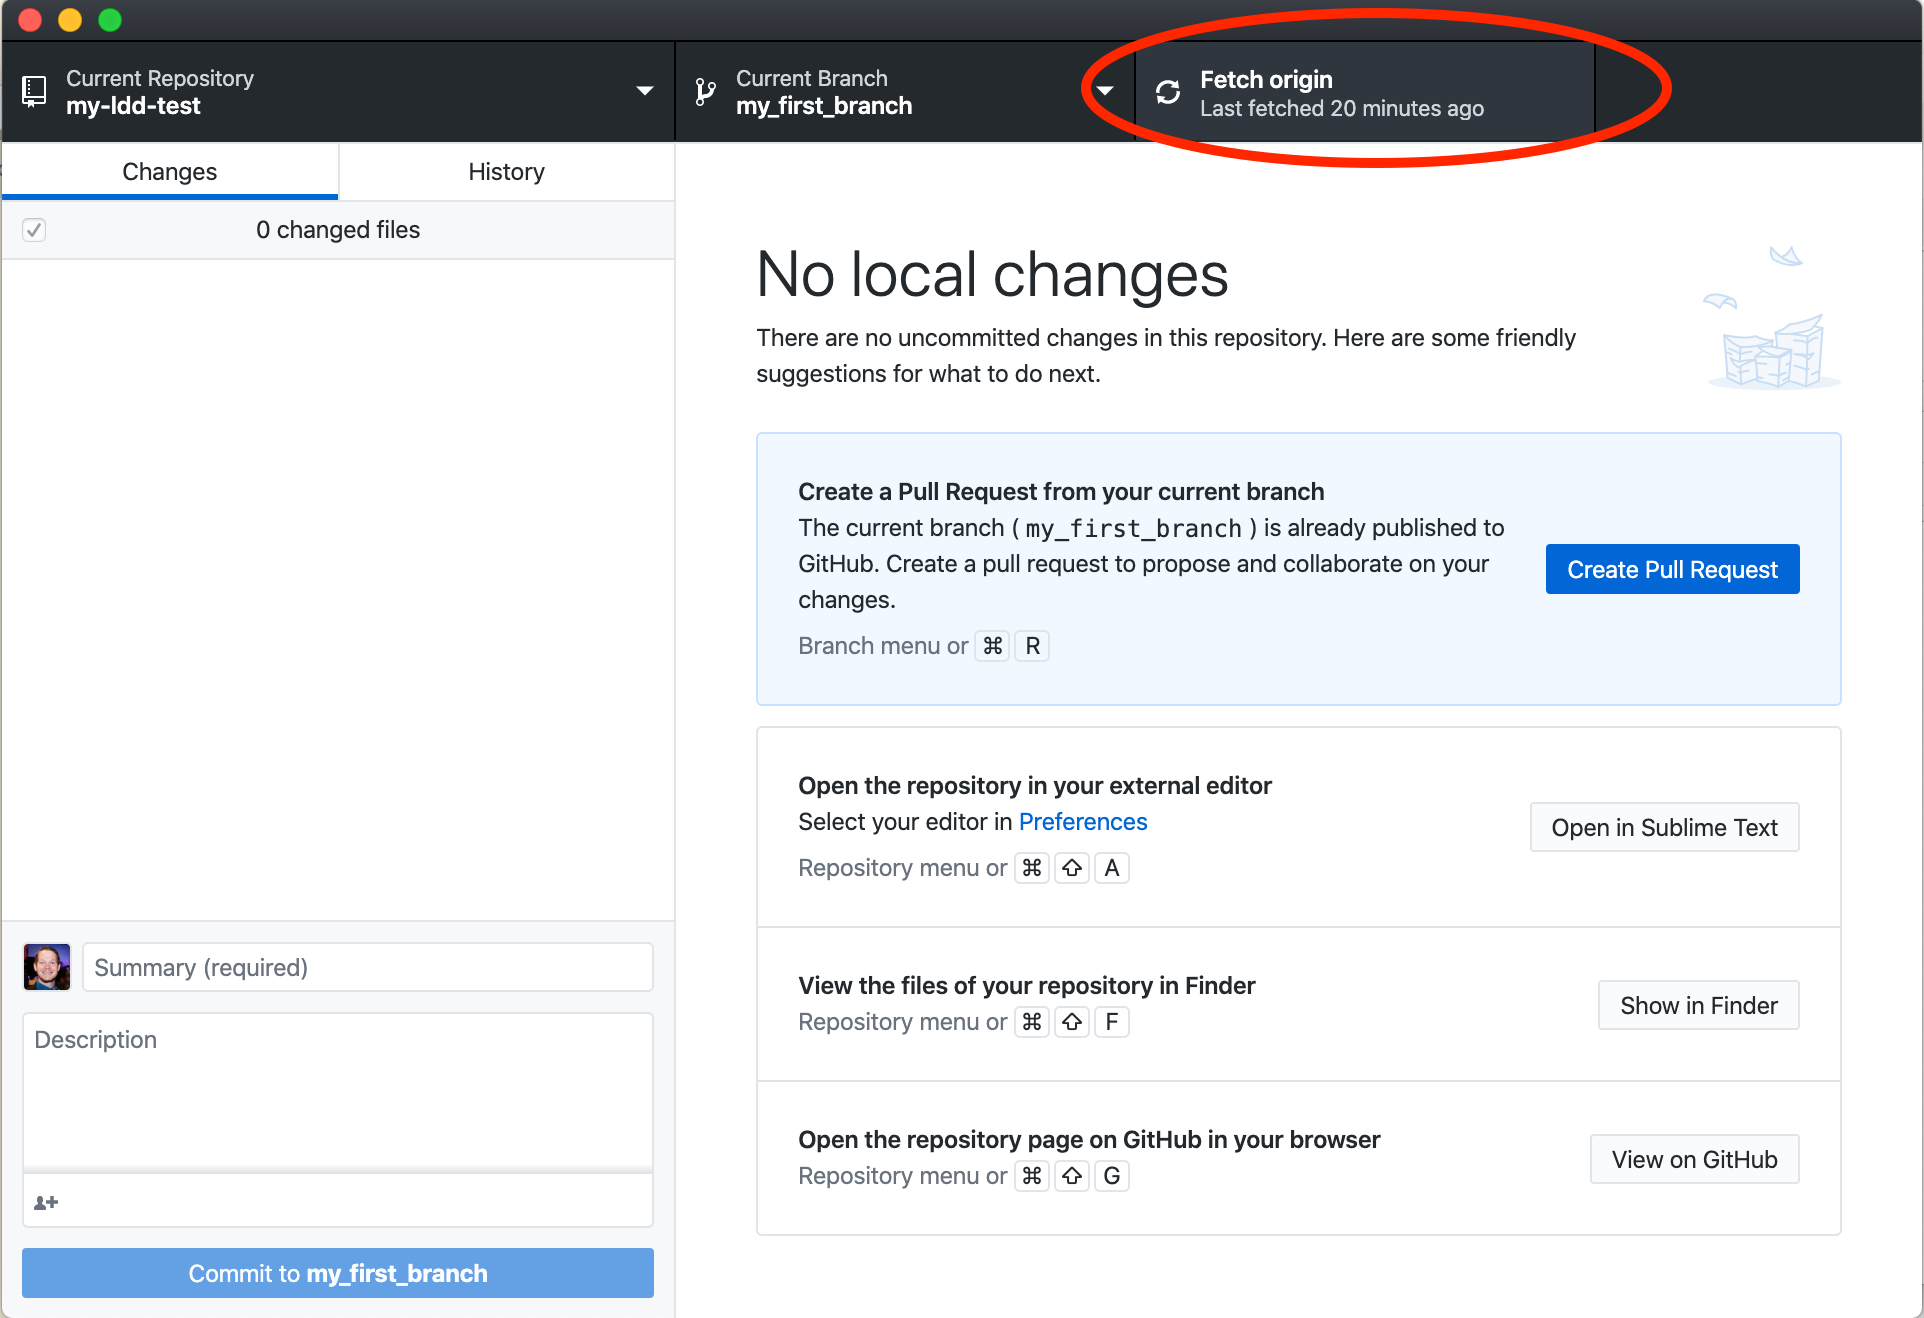
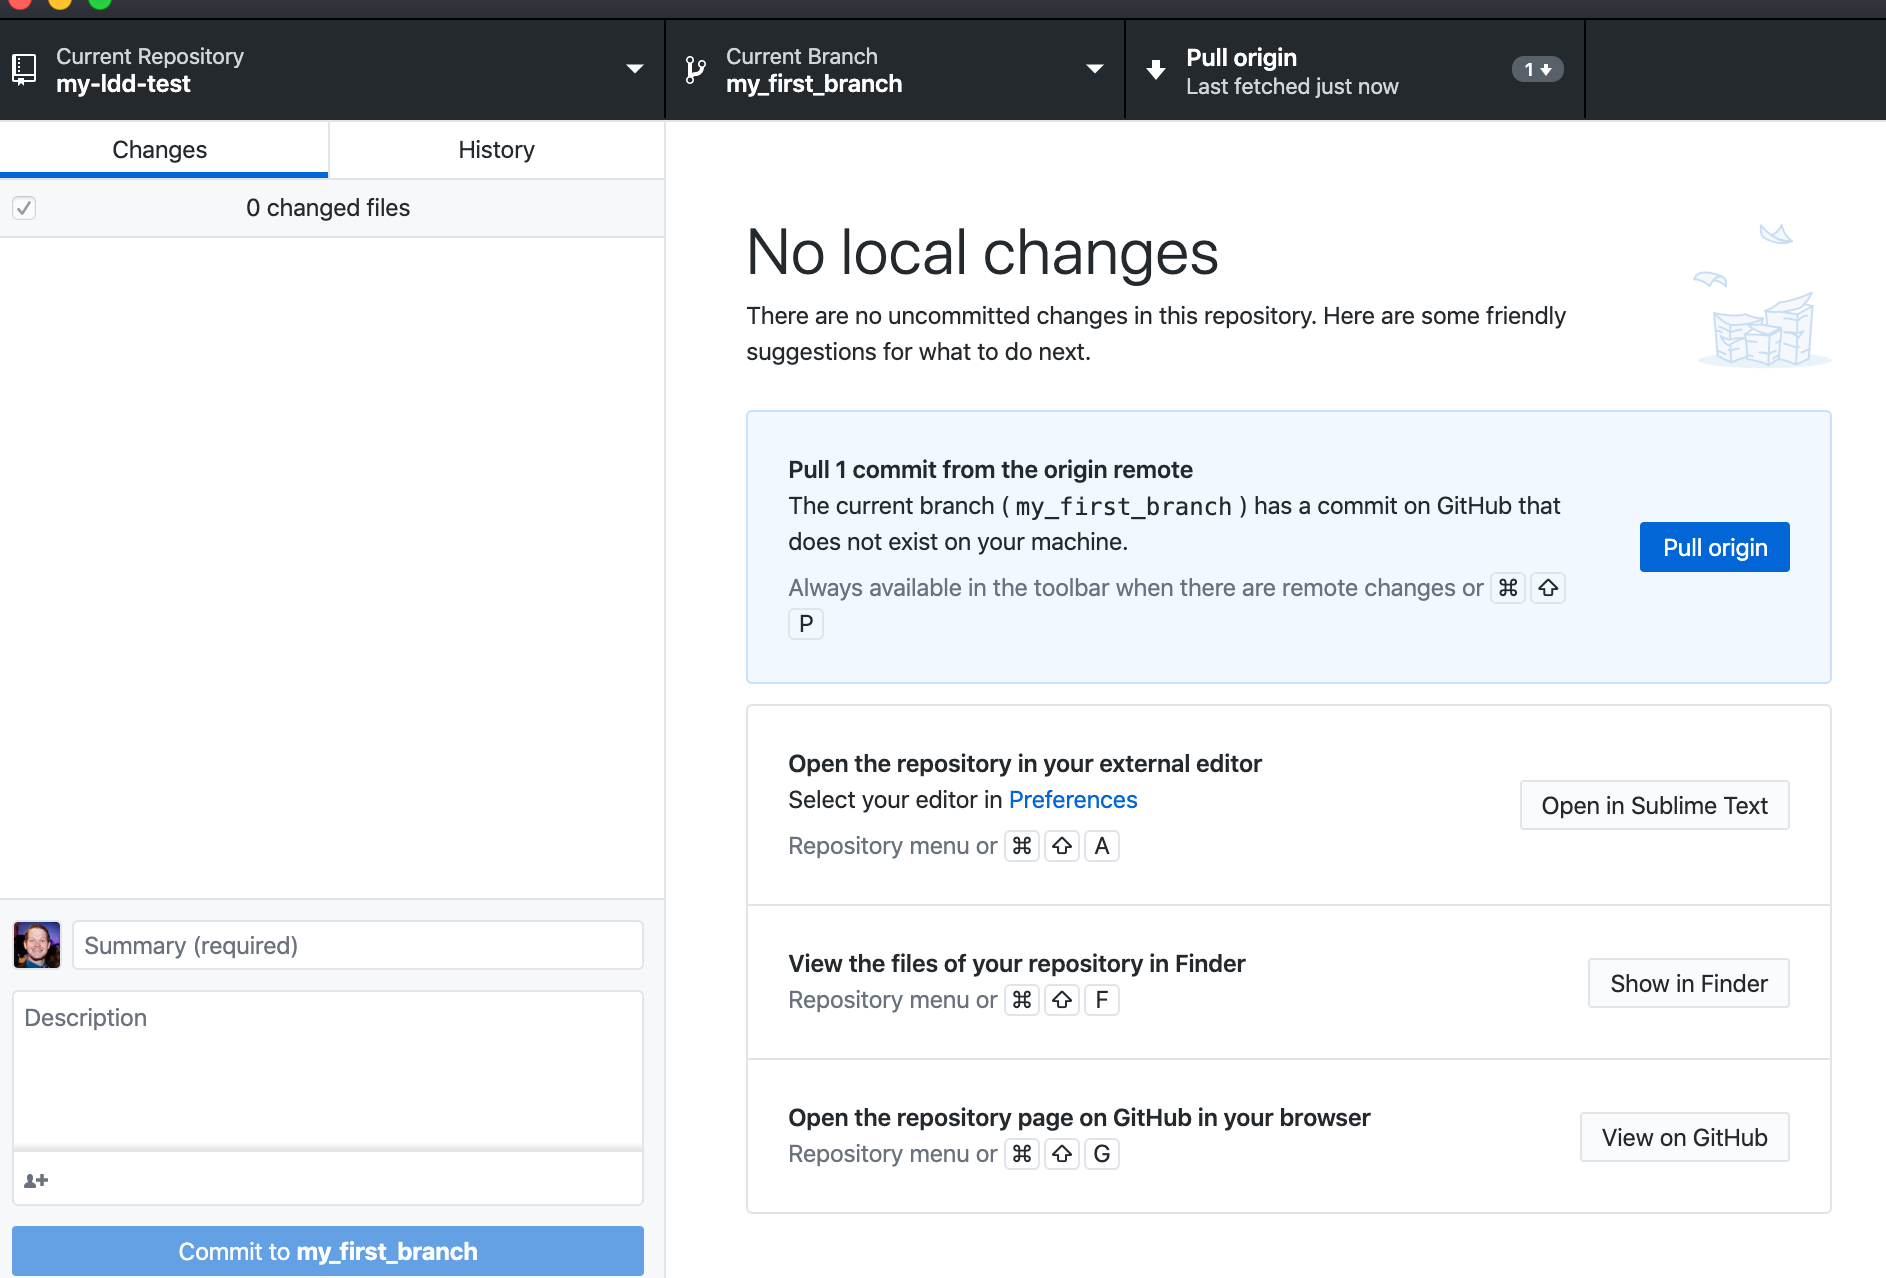
You should now see a button that appears that says
Pull Origin. This is basically saying Github Desktop has noticed your branch has changed since you last pushed files to it or refreshed the branch. As per theContinuous Integration with Github Actionssection described, there were some processes behind the scenes that auto-generated dictionaries and pushed them to your branch. You need to update your local branch with those changes to make sure you are up to date. SelectPull Origin.
Note
Github Actions can take a few minutes to complete. During your future development efforts, if the dictionaries don’t immediately appear, just wait a few minutes, or check your Github Actions to see their status or if they failed.)
You can now open the XSD / SCH and notice that those files are now up-to-date with what is in Github.
6. Create a Pull Request (PR)
Now that we have a branch and some changes committed, how do we get those changes into the main branch? By creating a pull request.
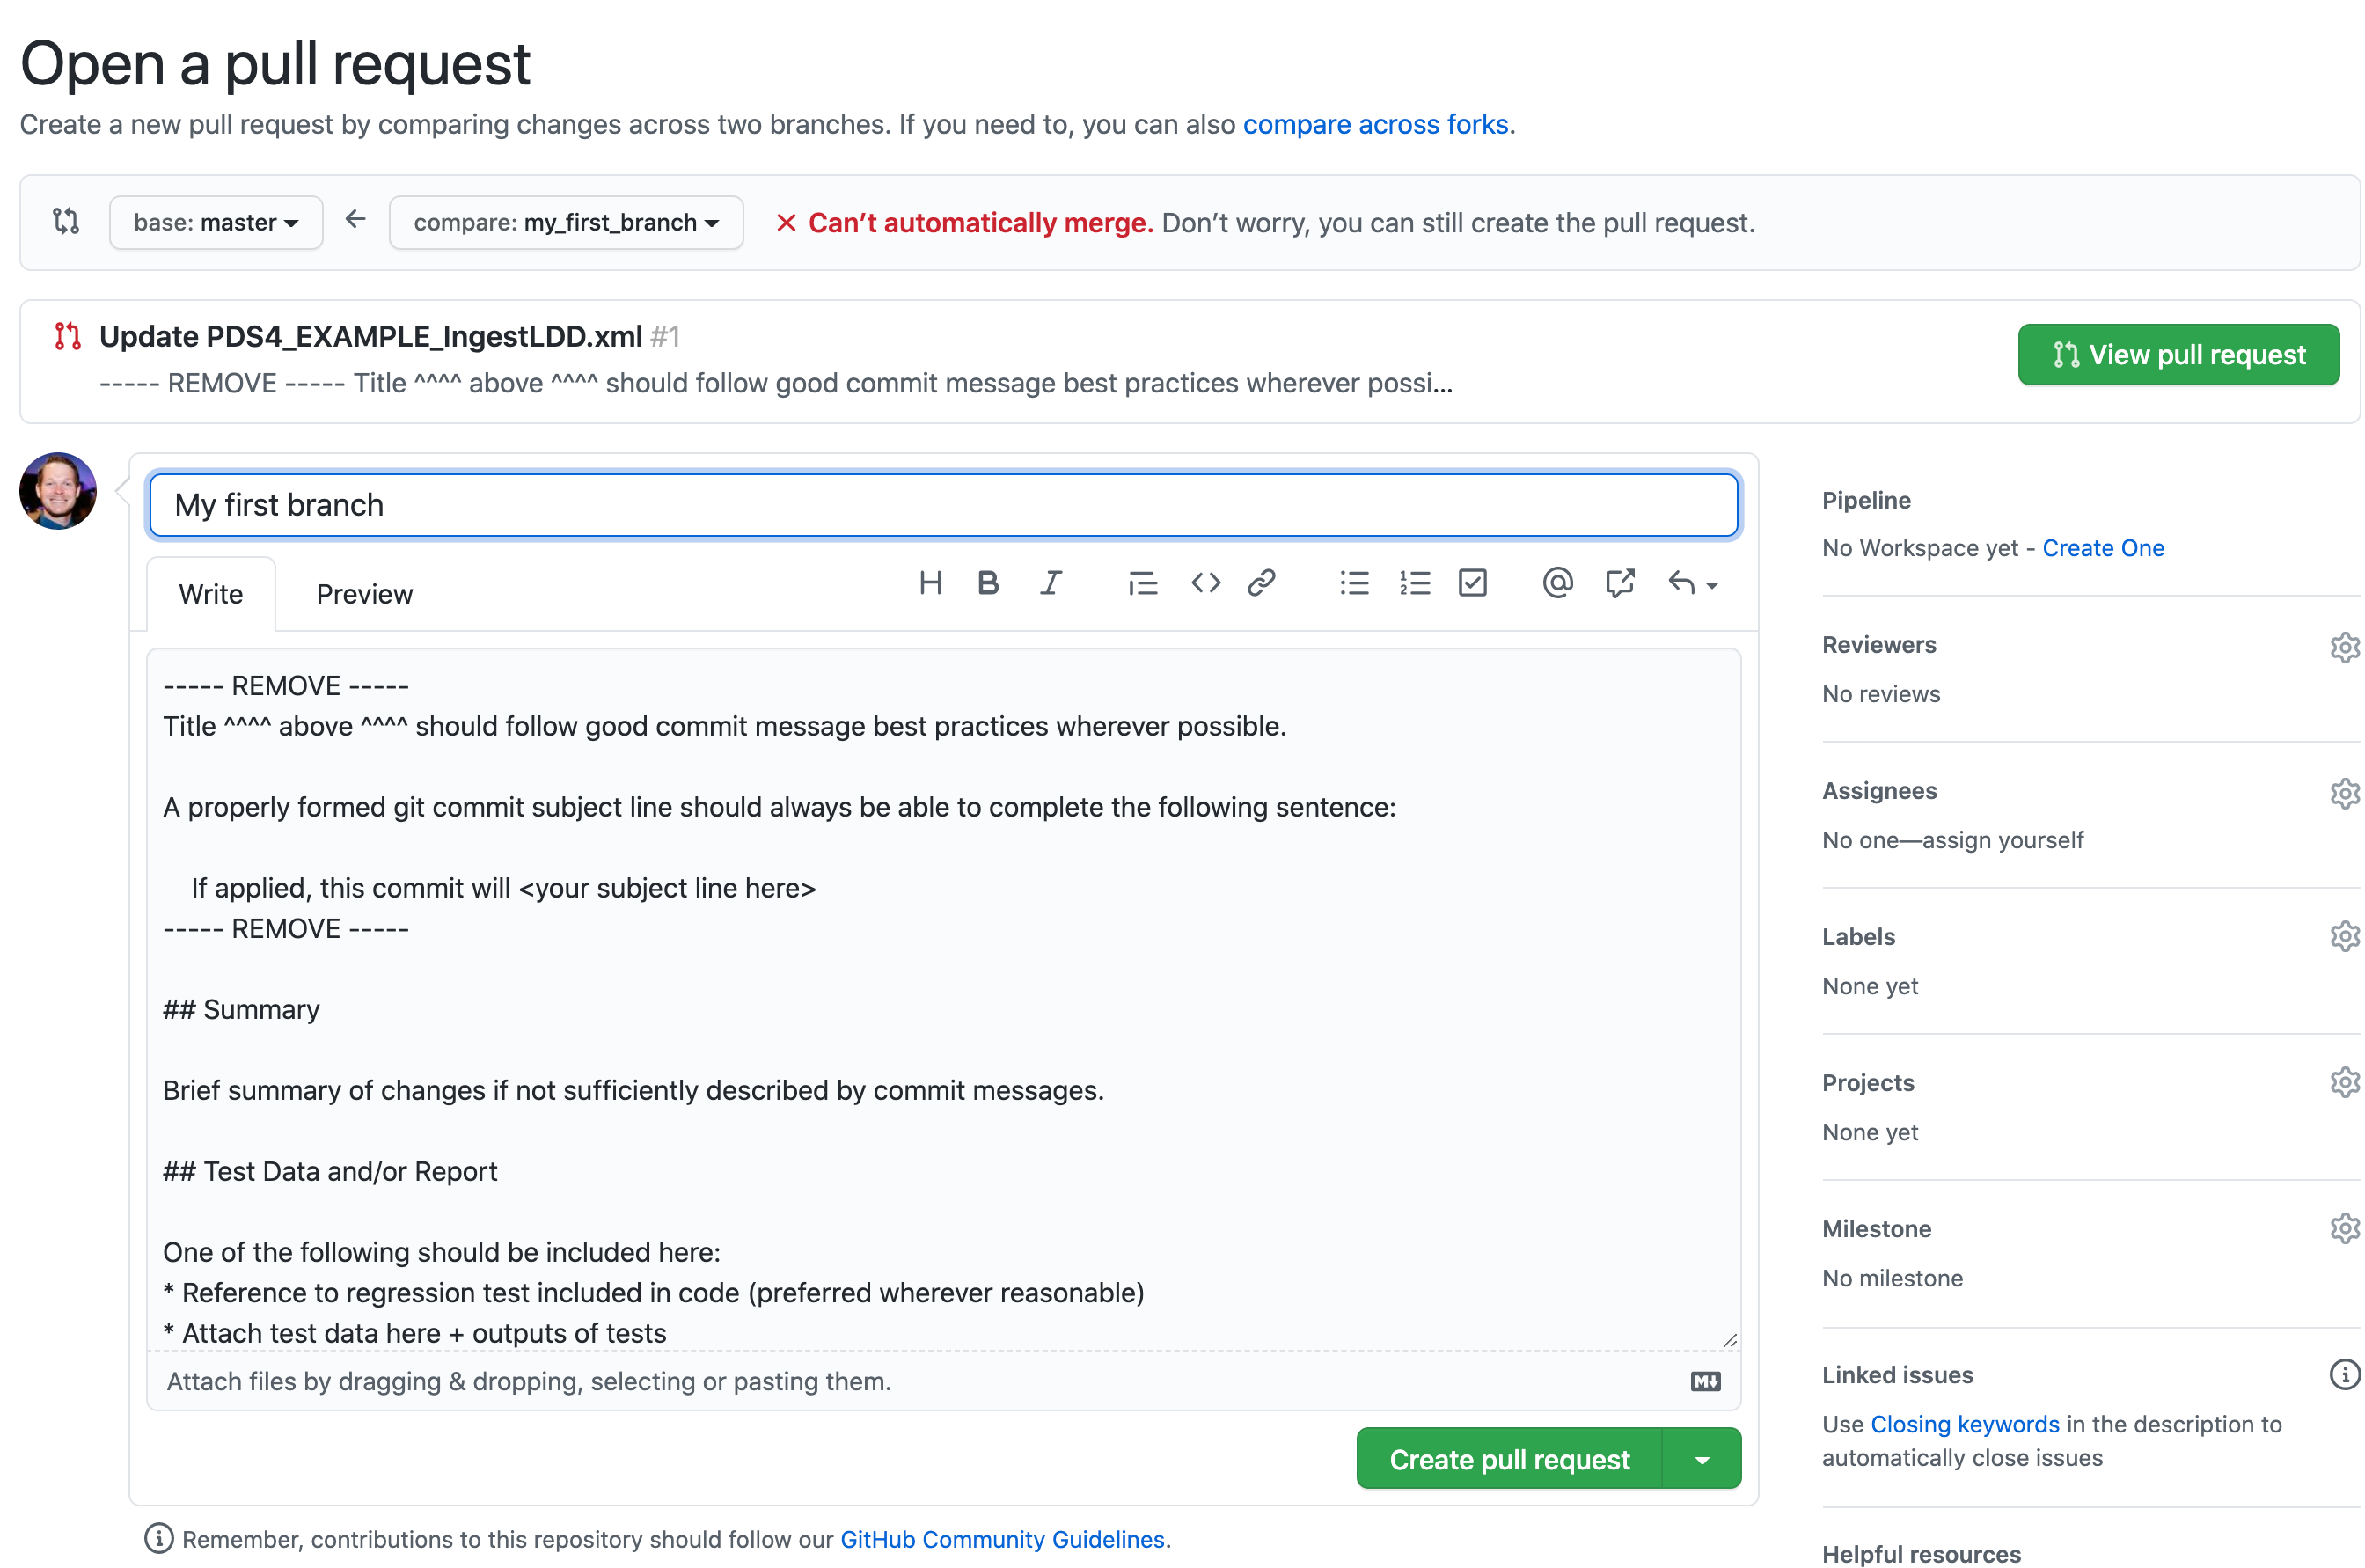
Once you have all the changes you want to commit for this particular issue, we can create a pull request. From Github Desktop, select the
Create Pull Requestbutton, which will take you to Github.Similar to writing good commit messages, pull requests are important to ensure appropriate information is provided to both the LDD Change Control Board and future users / developers of the dictionary. Fill out the issue template appropriately and select Submit.
If this PR were created under a repo within the PDS Data Dictionaries organization, the LDD CCB would be automatically assigned as a reviewer on the PR. See LDD Update Process for more details on the review process.
LDD Update and Break Build Tutorial
This tutorial will help test out breaking the automated LDD build process so you can see some of the issues that may arise.
1. Clone the ldd-template repository
See #1 from LDD Update and Build Tutorial above for setting this up.
2. Create a Branch for Your Proposed Changes
See #2 from LDD Update and Build Tutorial above for setting this up.
3. Make an Update and Push to Branch
See #2 from LDD Update and Build Tutorial above, except for step 2b. Here, make an invalid update to break the build:
<DD_Attribute>
    <name>my_first_attribute</name>
    <version_id>1.0</version_id>
    <local_identifier>my_first_attribute</local_identifier>
    <nillable_flag>false</nillable_flag>
    <submitter_name>Jane Doe</submitter_name>
    <definition>My first attribute
    </definition>
    <DD_Value_Domain>
          <enumeration_flag>false</enumeration_flag>
          <value_data_type>ASCII_FOO</value_data_type> <---- INVALID DATA TYPE INTRODUCED ----->
          <unit_of_measure_type>Units_of_None</unit_of_measure_type>
    </DD_Value_Domain>
</DD_Attribute>
4. Continuous Integration with Github Actions
You should now be able to go out to your Gitub Actions, see a failure, and trace through the logs to determine the issue.